
How to Embed a Custom Countdown Timer in MailerLite Emails with Countdown Builder
 By Mehedi Hasan
MailerLite's drag-and-drop editor includes a Code block, so you can embed a countdown timer generated by a timer service.
This guide walks through the process with Countdown Builder, the timer service this blog is published by: design the timer, copy its HTML, paste it into the email, and test before sending.
When a Countdown Timer Fits an Email
A countdown timer gives a deadline a visual form: instead of a sentence saying the sale ends Friday, the reader sees the time counting down. It's a fit for campaigns with a real end point:
- Flash sales
- Event registration
- Limited-time offers and discount deadlines
The timer is one element of the email — the offer, the copy, and the deadline still do the work.
How to Add a Countdown Timer in MailerLite
The workflow in MailerLite:
flowchart LR
    A["Design the timer in Countdown Builder"] --> B["Open your MailerLite campaign"]
    B --> C["Drag in a Code block"]
    C --> D["Paste the HTML into the Custom HTML Code field"]
    D --> E["Preview and test"]
    E --> F["Finalize and send"]
Step 1: Design the Timer in Countdown Builder
Visit Countdown Builder: Go to Countdown Builder and start creating your timer. No account is needed to begin, and you can design a timer for free.
Set the timer details: Enter the end date and time, and select the time zone your deadline applies to.
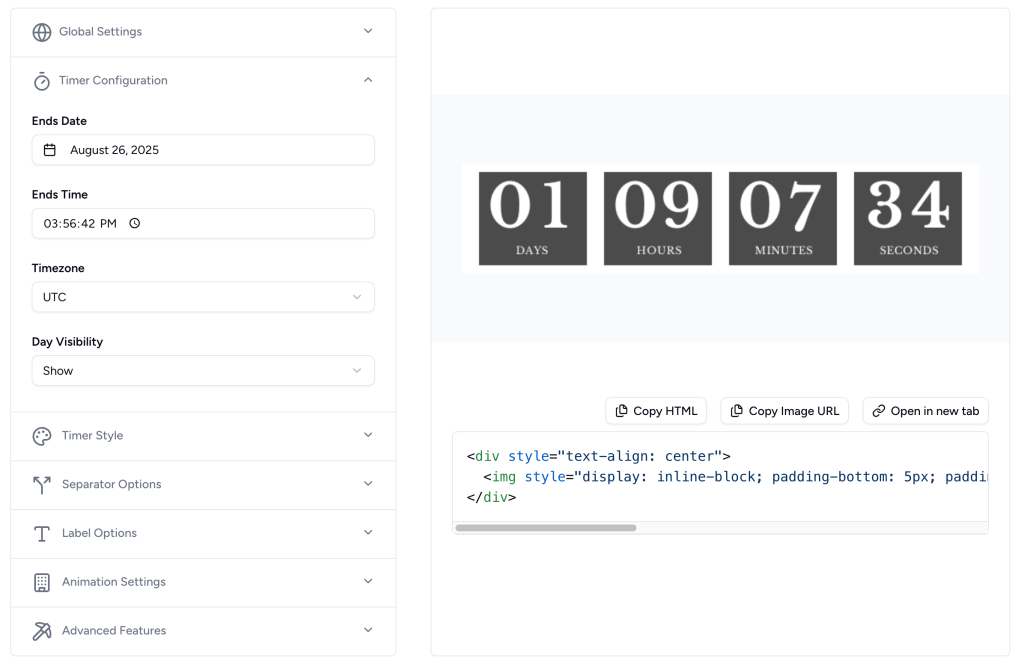
Customize the design: Use the editor to tailor the timer — styles such as classic, bold, or minimal, plus colors, fonts, and sizes to match the email's design. You can add a logo or adjust the background.
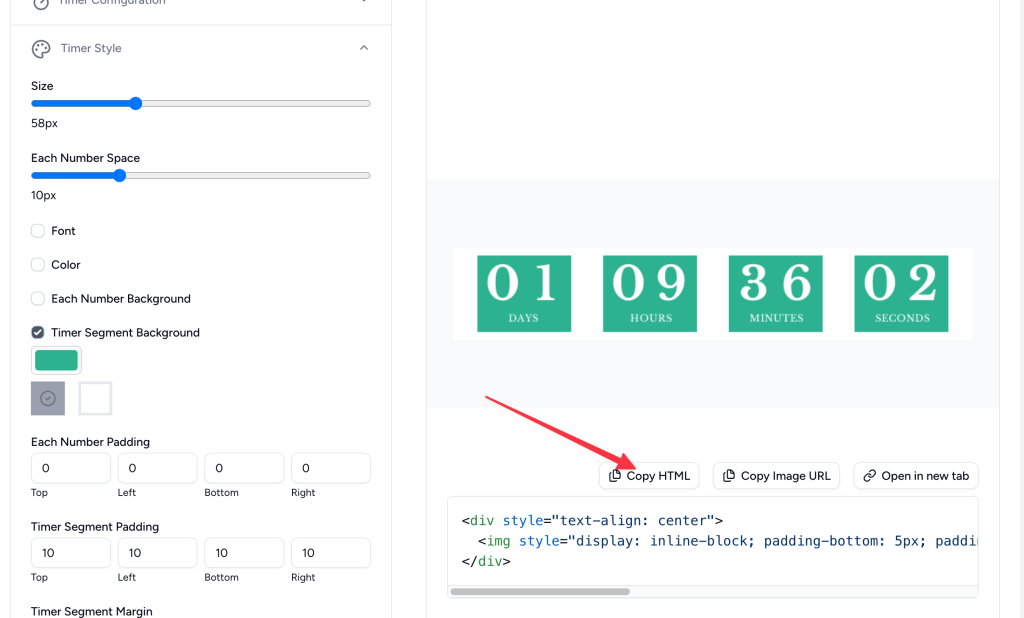
Copy the HTML code: When the design is ready, click Copy HTML to copy the generated code. This is what you'll paste into MailerLite.
Step 2: Add the Timer to Your MailerLite Email
Open your campaign: Log in to MailerLite, go to Campaigns, and create a new email campaign or open an existing one in the drag-and-drop editor.
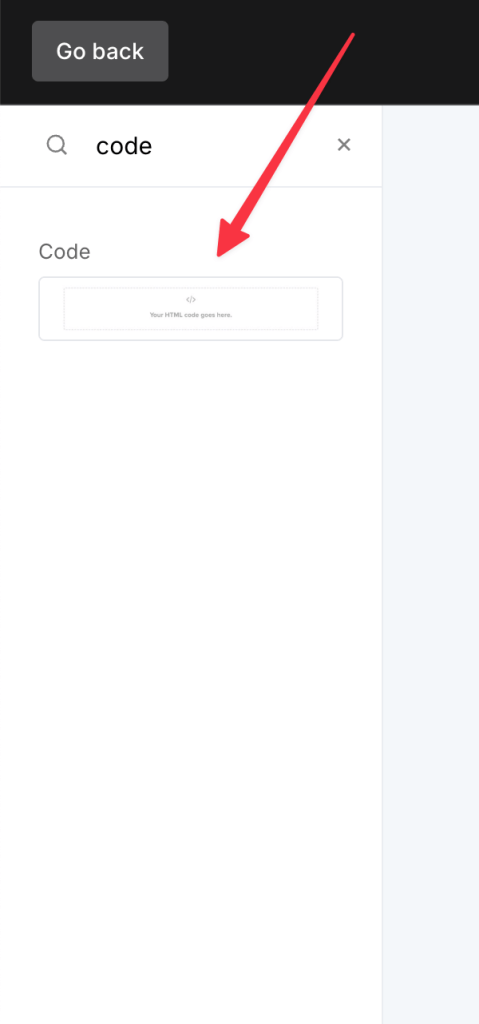
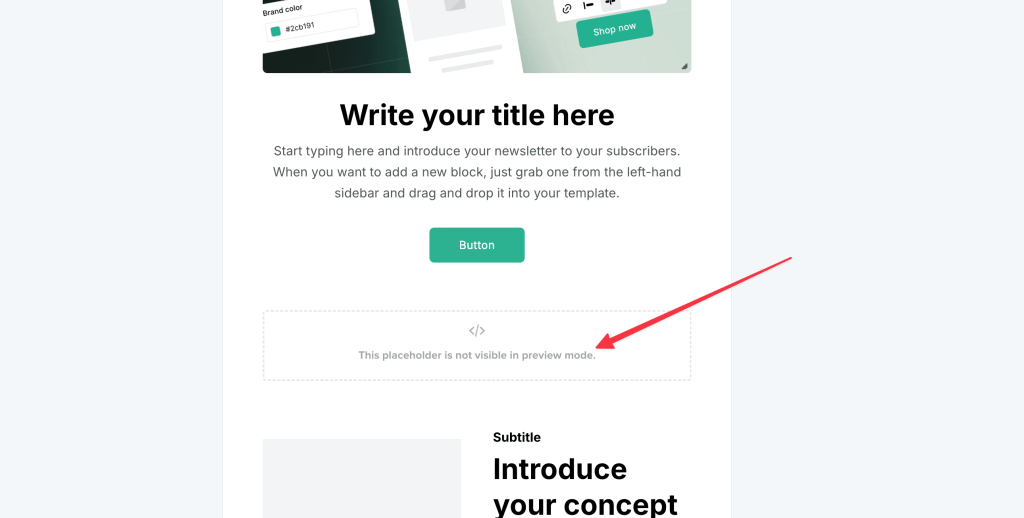
Insert a Code block: In the editor's left-hand menu, find the Code block. Drag it to where the timer should appear, such as near the header or the call-to-action.
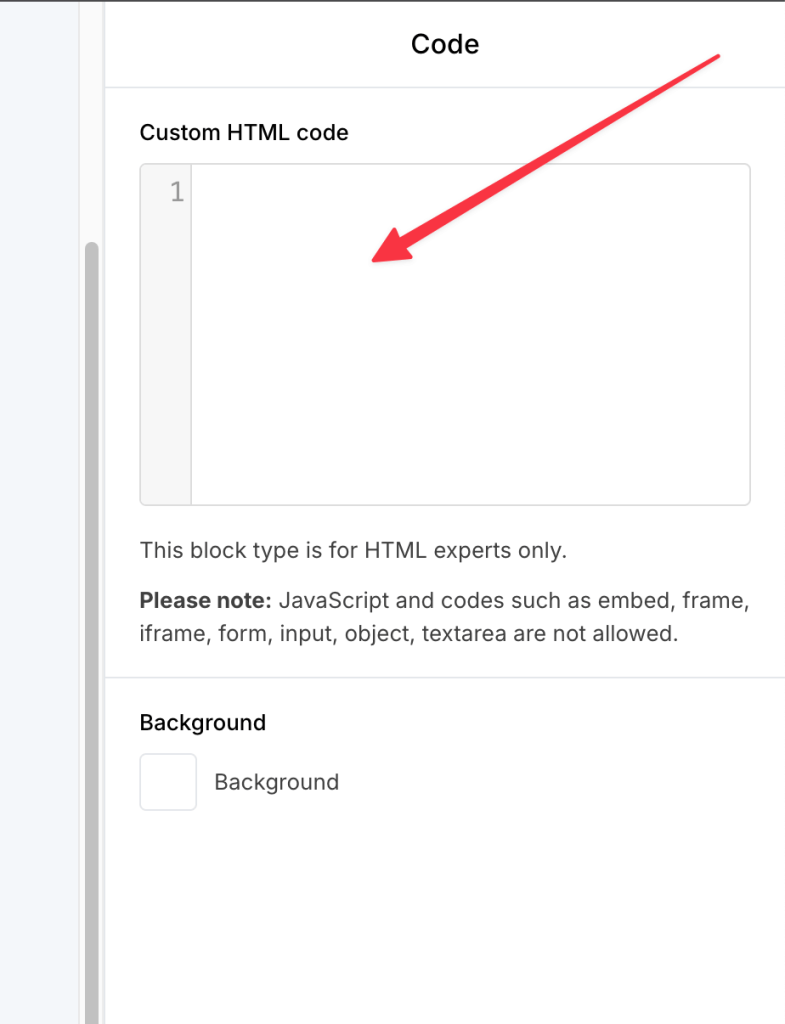
Paste the HTML code: Click the code block to open the editing panel on the right. Paste the HTML you copied from Countdown Builder into the Custom HTML Code input field.
Save your work: Click Save to embed the timer in the email.
Step 3: Preview and Test the Timer
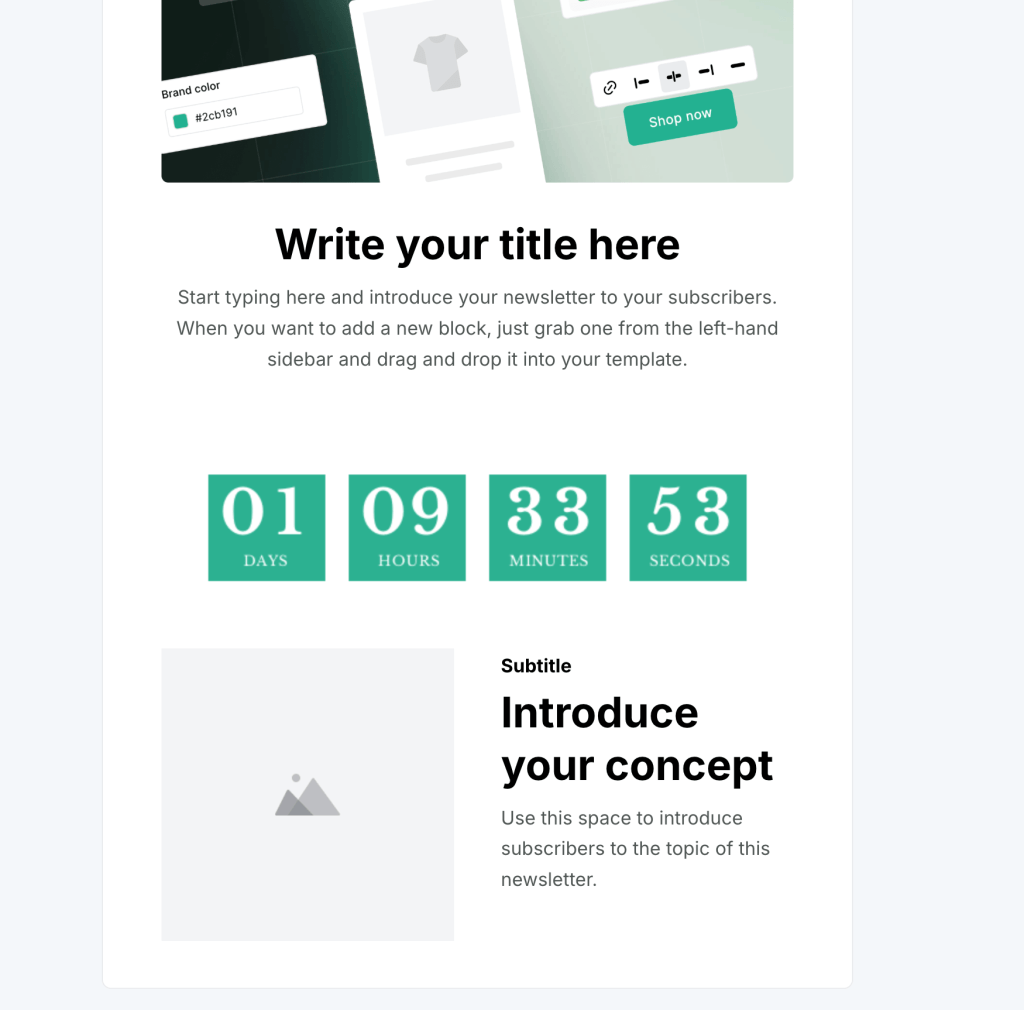
- Preview the email: In MailerLite's email builder, click Preview and Test to switch to preview mode and see the timer within the layout.
- Send a test email to yourself and a colleague, and open it on the devices and clients your subscribers use (for example Gmail and Outlook, on mobile and desktop). Countdown Builder's timers are animated GIFs that regenerate each time the email is opened.
- Verify the countdown: Check that the timer displays the correct time remaining. If something needs adjusting, return to Countdown Builder, tweak the design, and copy the HTML again.
Step 4: Finalize and Send the Campaign
Double-check the email content and the timer's deadline, then schedule or send the campaign to your subscribers.
Countdown Builder or MailerLite's Built-In Countdown?
MailerLite's editor includes a built-in countdown timer, which is enough when you just need a countdown to a fixed date. A separate timer service is worth considering when you need:
- Other timer types: Countdown Builder adds evergreen timers (started per recipient at open) and dynamic timers (per-recipient deadlines via merge tags), alongside fixed-date timers.
- More design control: colors, fonts, labels, multilingual text, and custom expiry states, so the timer matches the email's design.
- Reuse across platforms: the same service works in other ESPs and on website pages, which matters if a campaign spans email and a landing page.
If the built-in block covers everything you need, there's no reason to add a second tool.
Best Practices for Using a Countdown Timer in Email
- Strategic placement: put the timer where the deadline matters — the header or just above the call-to-action button.
- Plain-text backup: state the deadline in words too, so readers with images blocked still see it. Apple Mail Privacy Protection can also freeze the animation; Countdown Builder serves a static fallback in that case.
- Mobile optimization: check that the timer is readable on a phone without zooming.
- A/B testing: run a test with and without the timer to measure its effect on clicks and conversions.
- Real deadlines only: a timer on an offer that never expires teaches readers to ignore timers.
Final Thoughts
Embedding a countdown timer in MailerLite is a short job: design the timer, copy the HTML, paste it into a Code block, test, send. The decisions that matter are the timer type and whether the deadline is real.
If you'd like to try it, you can create a free timer. The free plan doesn't require a credit card and doesn't add a watermark.
Last updated: September 2026. The MailerLite steps above reflect the drag-and-drop editor as of this date; MailerLite's interface changes over time, so the exact labels may differ. Countdown Builder features and pricing reflect the product at the time of updating and can change — check the pricing page for current details.
Written by Mehedi Hasan
Writer & Developer. He writes about email marketing, countdown timers, and campaign design.
Connect on LinkedIn