
How to Add a Countdown Timer to Kit Email Campaigns Using Countdown Builder
 By Mehedi Hasan
A countdown timer can be useful in a Kit campaign with a real deadline — a course launch, a flash sale, or a limited-time offer.
Kit's email editor includes a custom HTML block, so you can embed a timer generated by an external timer service in broadcasts, sequences, and automations. This tutorial shows how to create a timer in Countdown Builder, add it to a Kit email, and test it before sending.
When a Countdown Timer Helps in Kit
Kit campaigns often promote time-sensitive offers — enrollment windows, launch discounts, live events. A countdown timer gives those deadlines a visual representation:
- Fixed-date timers suit launches and sales with one shared end time.
- Evergreen timers reset per subscriber, which fits Kit's automated sequences where each subscriber joins at a different time.
Step-by-Step Guide: How to Add a Countdown Timer in Kit
From timer to launched Kit email:
flowchart LR
    A["Create the timer in Countdown Builder"] --> B["Open a Kit broadcast, sequence, or automation"]
    B --> C["Add an HTML block"]
    C --> D["Paste the timer code"]
    D --> E["Preview and test"]
    E --> F["Launch the campaign or automation"]
Step 1: Create Your Countdown Timer with Countdown Builder
- Visit Countdown Builder: Go to https://app.countdownbuilder.com and sign up for a free account or log in.
- Set Timer Details:
- Enter the end date, time, and time zone for your audience.
- Enable evergreen timer functionality (if needed) to reset the timer based on each subscriber's open time, for Kit's automated sequences.
- Customize the Design:
- Select from 65+ templates or build from scratch.
- Adjust foreground and background colors, choose from an extensive font library, or add a pulsing separator animation.
- Use advanced label styling to tailor labels (Days, Hours, Minutes, Seconds) for readability and brand match.
- Configure Custom Expiry Settings:
- Decide what shows post-expiry:
- Zero (Default): Display a text message (e.g., "Offer Ended!") as the final GIF frame.
- Custom Text: Show a branded message.
- Custom Image: Upload a graphic (e.g., "Sold Out").
- Useful in Kit automation sequences, where subscribers may open the email after the deadline.
- Decide what shows post-expiry:
- Preview and Save:
- Preview to align with your Kit email's aesthetic.
- Click Update to save.
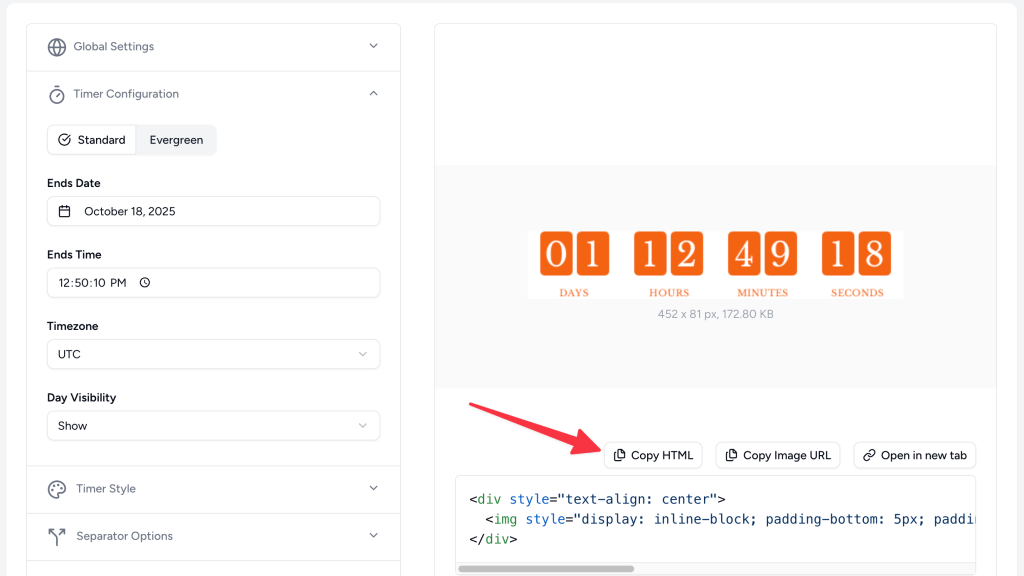
- Copy the HTML Code:
- Click Copy HTML to get the embeddable code.
Step 2: Add the Timer to Your Kit Email or Automation
- Log in to Kit: Access your Kit account and navigate to Broadcasts, Sequences, or Automations to create or edit an email.
- Open the Email Editor: Use Kit's drag-and-drop interface to open your newsletter or automation template.
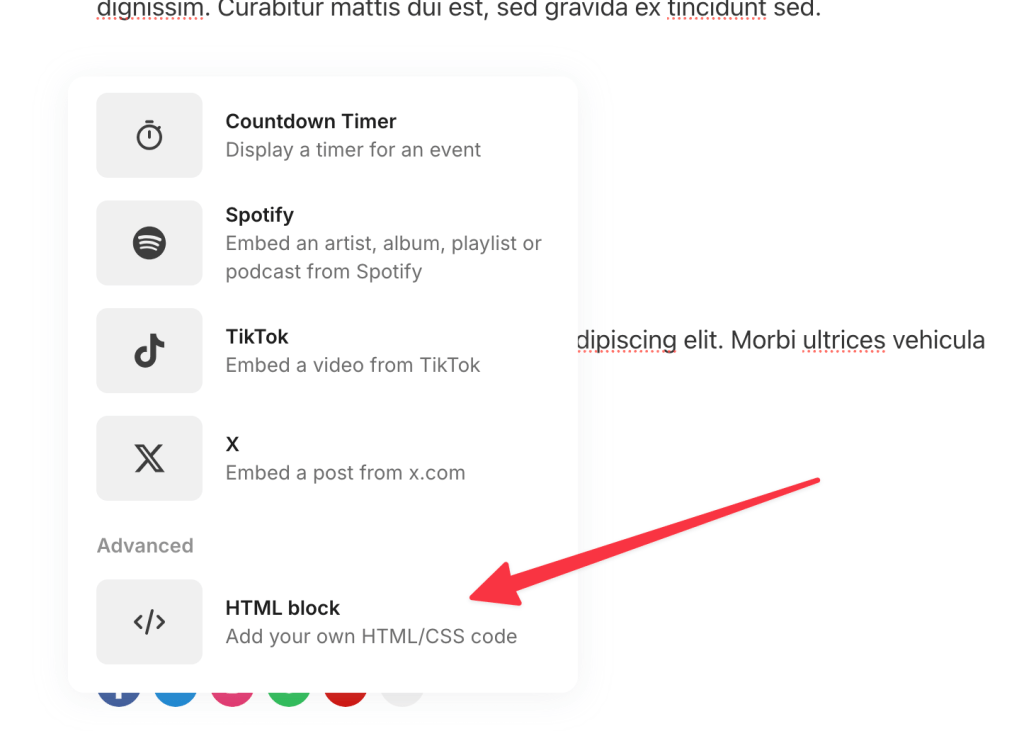
- Add a Custom HTML Block:
- Add the HTML block from the elements menu to your desired spot (e.g., near the CTA or in the hero section).
Step 3: Paste the Countdown Timer Code
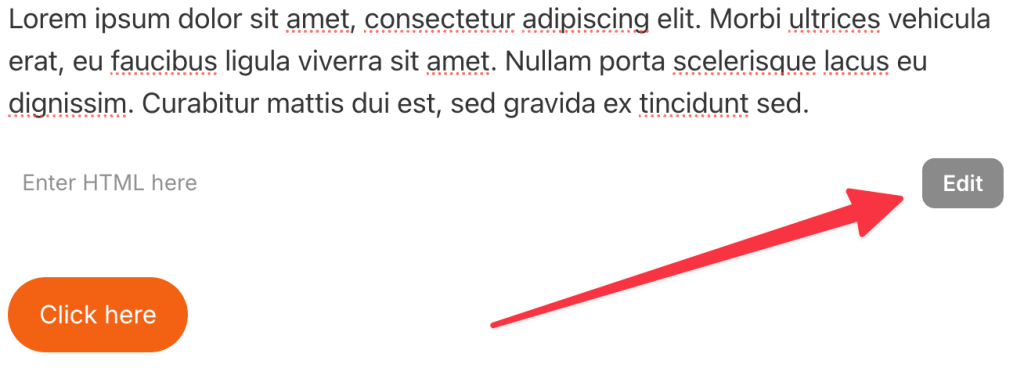
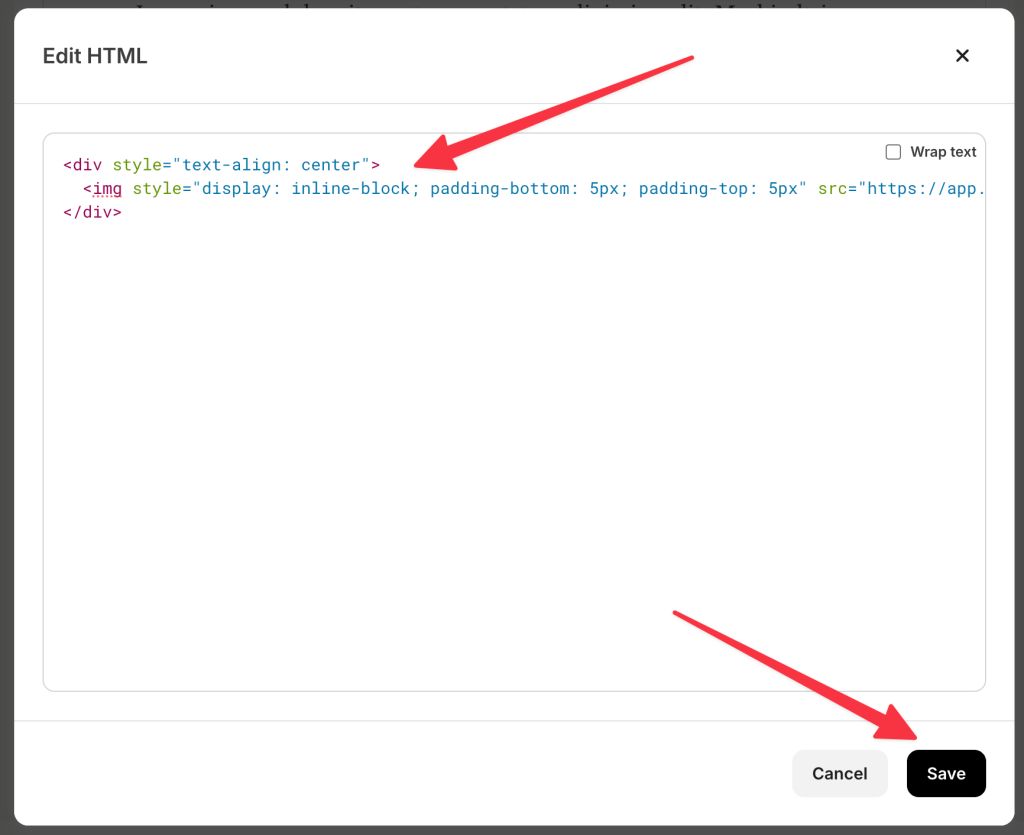
- Edit the HTML Block:
- Click the block to open the code editor.
- Paste the HTML code from Countdown Builder into the content area.
- Save Changes:
- Click Save to embed the Kit countdown timer. It renders as an animated GIF.
Step 4: Preview and Test Your Countdown Timer
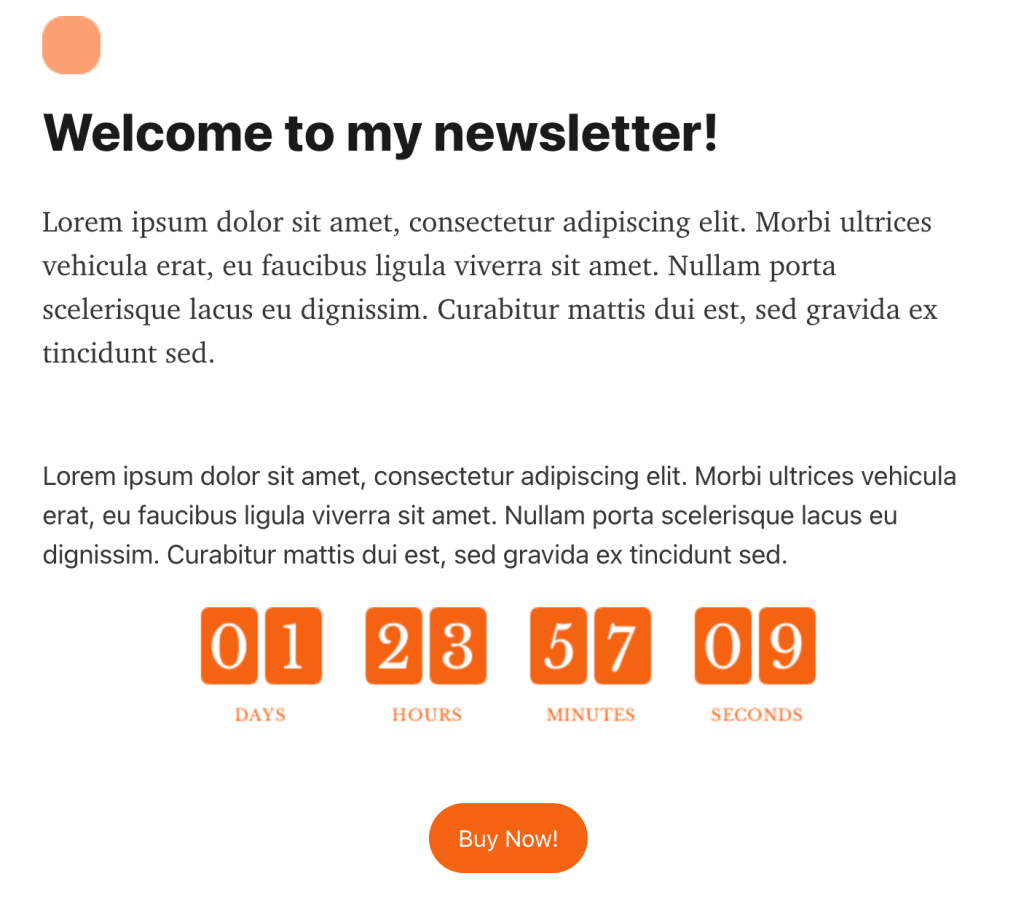
- Preview the Email: Use Kit's preview tool to check how the timer fits your design and segments.
- Send a Test Email: Test across devices (mobile, desktop) and clients (Gmail, Outlook, Apple Mail). Older Outlook versions may show only the first frame of an animated GIF.
- Verify Functionality: Confirm the timer counts down accurately and switches to your custom expiry setting.
Step 5: Launch Your Campaign or Automation
Finalize your content, align the timer's end time with your actual deadline (e.g., a 24-hour launch), and send via broadcast or activate your automation. Kit's analytics will track opens, clicks, and conversions.
Best Practices for Using Countdown Timers in Kit
- Brand consistency: Match colors and fonts to your Kit templates.
- Duration: Set 24–72 hour durations for broadcasts, or use evergreen timers for automated sequences.
- Targeting: Pair timers with Kit's tags, segments, and A/B testing where relevant.
- Mobile: Test how the timer sizes on mobile screens.
- Post-expiry: Use custom expiry settings to show late openers a sensible end state.
- Honest deadlines: Only promote deadlines that are real; offers that still work after the timer expires train subscribers to ignore timers.
Costs for Creator Sequences
One account covers every send in a launch — the announcement, the bonus stack, the cart-close — plus the evergreen sequences that run between launches. The free plan has no watermark; paid plans add unlimited timers and views, and the Business plan a custom domain with SSL. Current plans are on the pricing page.
About Kit
Kit (formerly ConvertKit) is an email platform aimed at creators, with a drag-and-drop email editor, visual automations, and support for custom HTML blocks — which is what makes an embedded countdown timer possible.
If you'd like to try it, you can create a free timer at Countdown Builder. The free plan doesn't require a credit card and doesn't add a watermark to the timer.
Last updated: September 2026. These steps reflect Kit's email editor and Countdown Builder as of this date. Email platform interfaces change over time, so the labels you see may differ slightly.
Written by Mehedi Hasan
Writer & Developer. He writes about email marketing, countdown timers, and campaign design.
Connect on LinkedIn