
How to Add a Countdown Timer to an AWeber Email
 By Mehedi Hasan
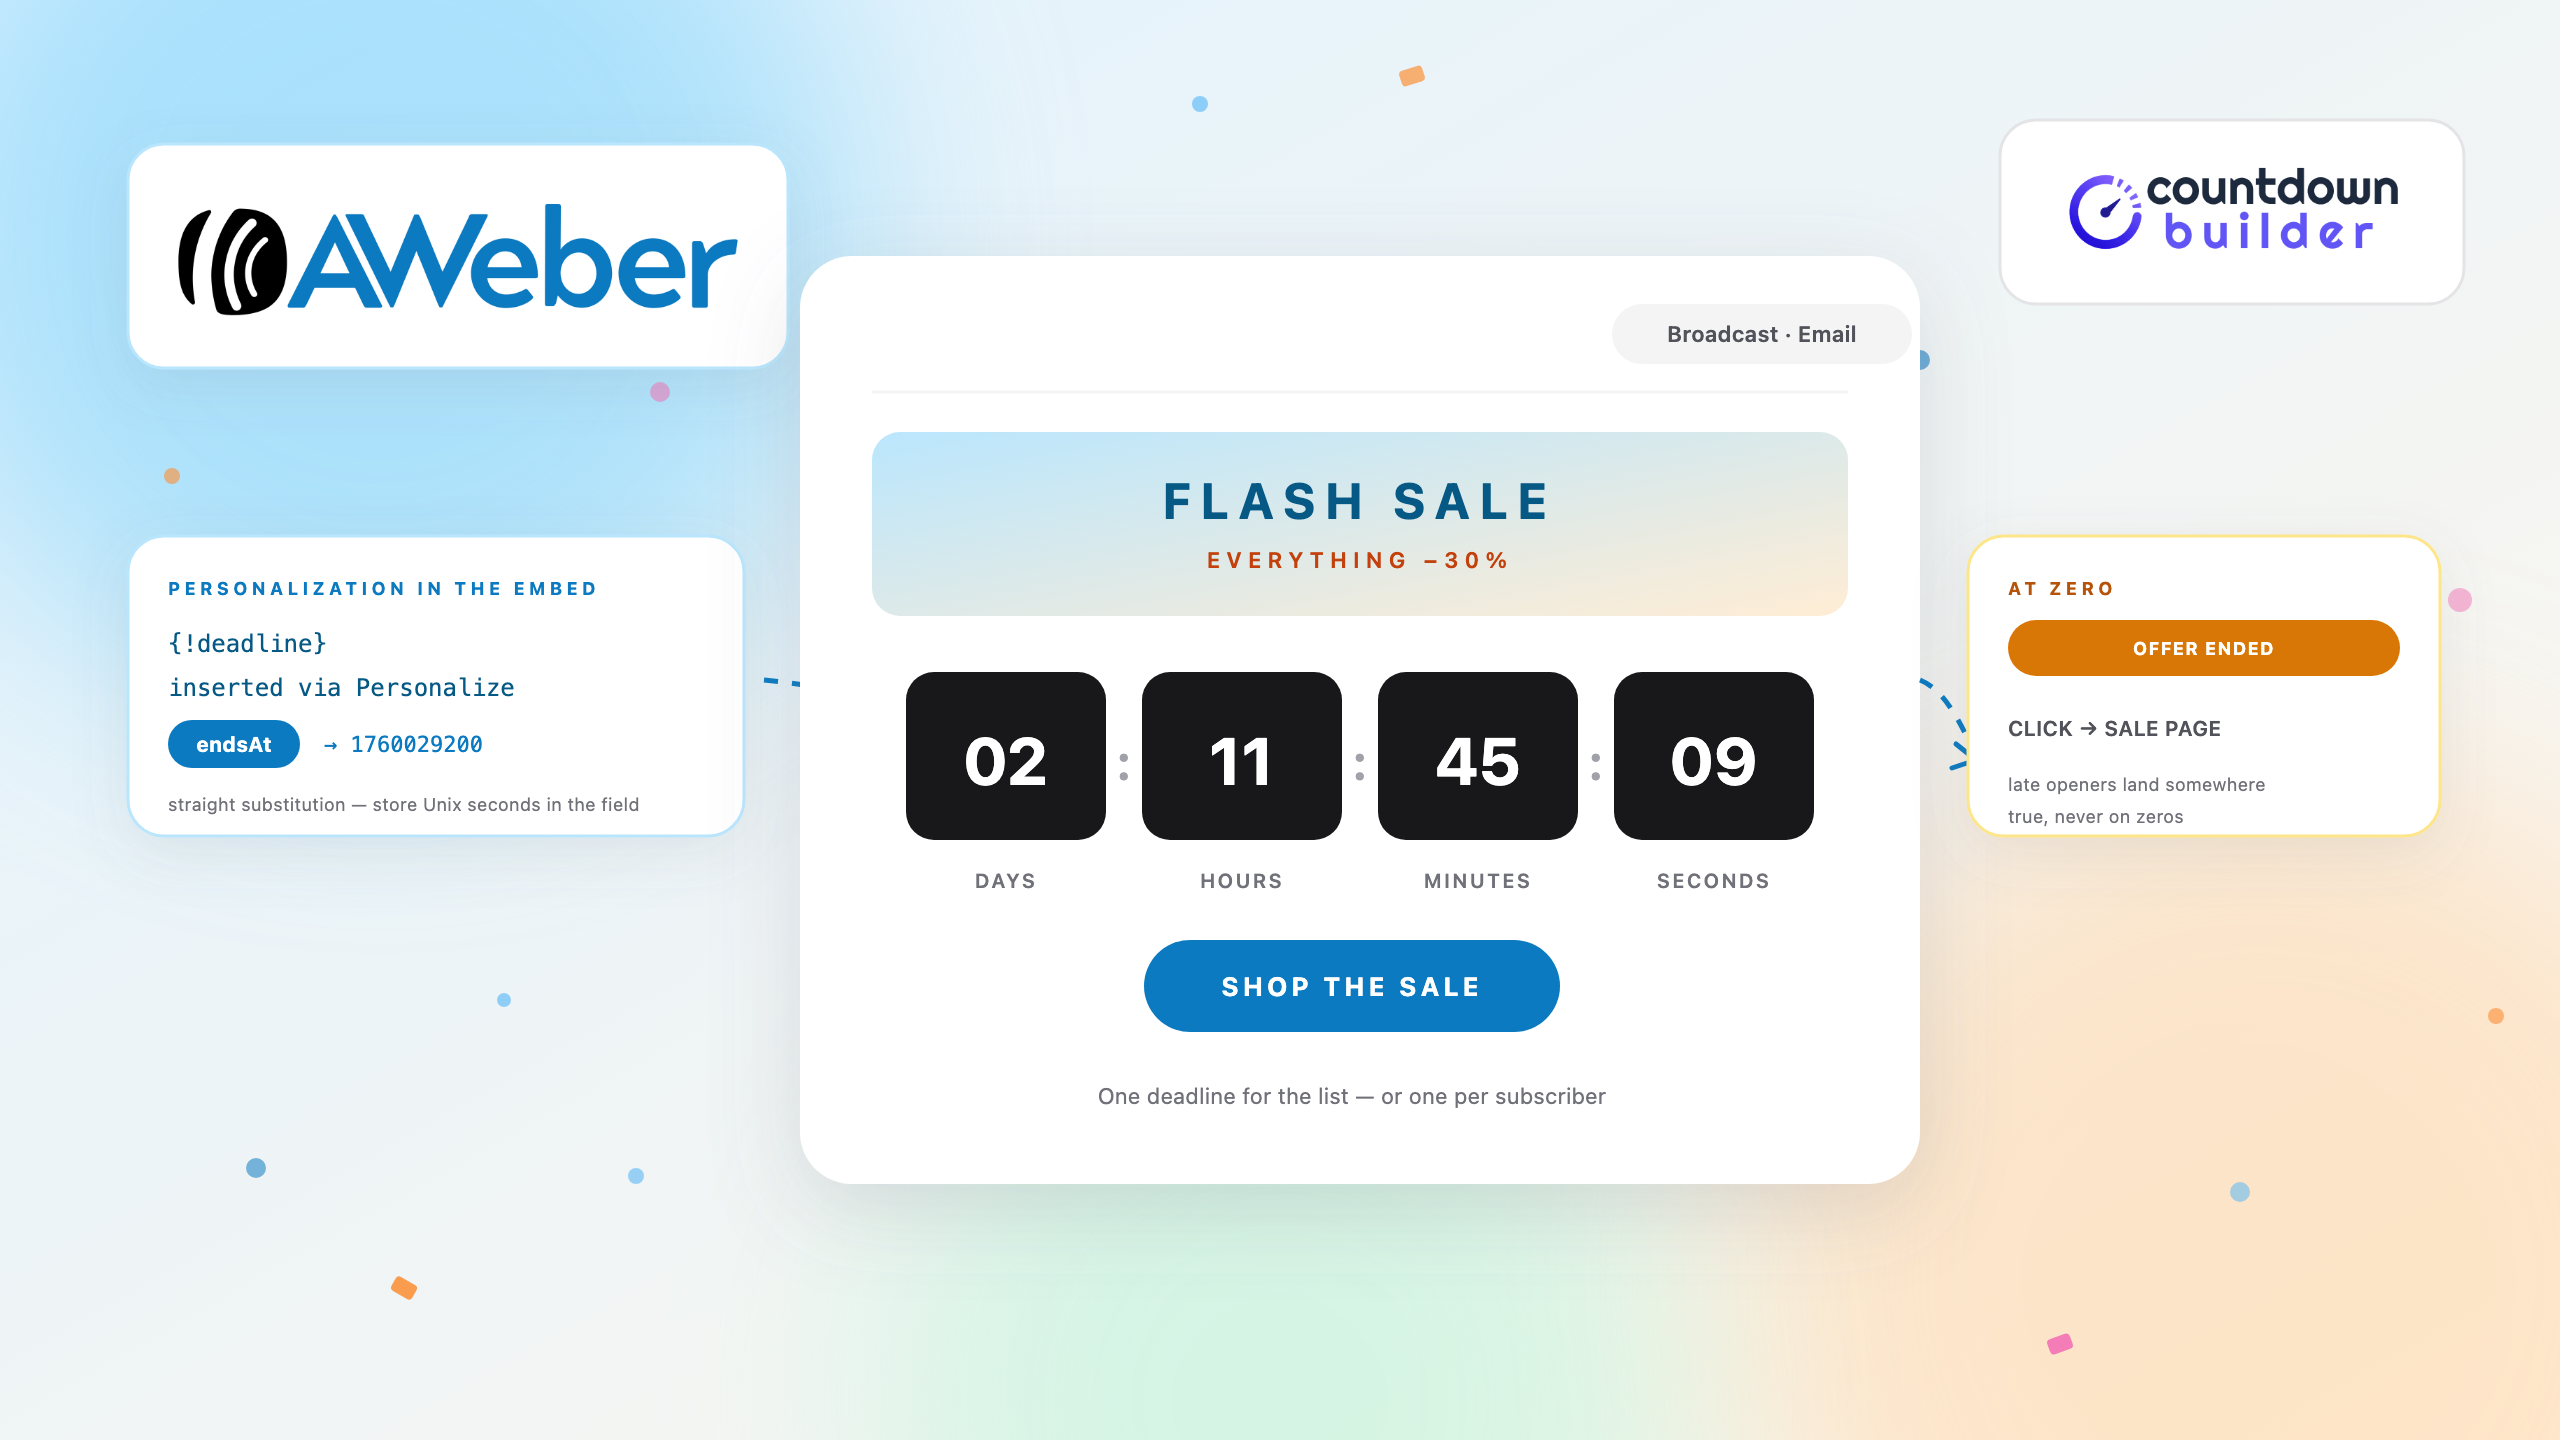
AWeber gives you several ways to build a message — the drag-and-drop email builder it recommends for most people, a Newsletter Assistant for AI-assisted drafts, Smart Designer for automated templates, and a Custom HTML Editor for people who want full control of the code — and none of them ships a countdown element. What several of them can do is load an image from a URL, and an image countdown timer lives at a URL. That's the whole opening.
This tutorial covers the rest: building the timer, getting it into an AWeber message through three routes (the Image element's URL field, the Source view inside a text block, or the Custom HTML Editor), giving each subscriber their own deadline with merge tags, and testing the result before it goes out. The examples use Countdown Builder, the timer service behind this blog.
How Email Countdown Timers Work
No email client runs JavaScript, so nothing ticks live inside the inbox. Countdown timers work around this by being animated images: a service renders the countdown as a GIF at a URL, and each time the email is opened, the image regenerates with the correct time remaining at that moment. The mechanics of the animated GIF — frames, delays, regeneration — are covered in a separate guide.
Two things follow. The end date and time zone you set on the timer are what the image is built from, so they have to be the campaign's real deadline. And the email has to load the image from the timer's URL — not from a copy uploaded to AWeber's image gallery. The Image element happily accepts uploads, but uploading the timer GIF stores a single frozen frame on AWeber's servers, and that frame is what every subscriber would see, forever. Step 3 keeps you on the right side of that rule.
What You Need
- An AWeber account with a broadcast or campaign message you're building
- A Countdown Builder account (the free tier works) with a timer set to your real end date
- The timer's GIF URL or HTML embed code, copied from the timer's page
The Flow at a Glance
Four steps, start to send:
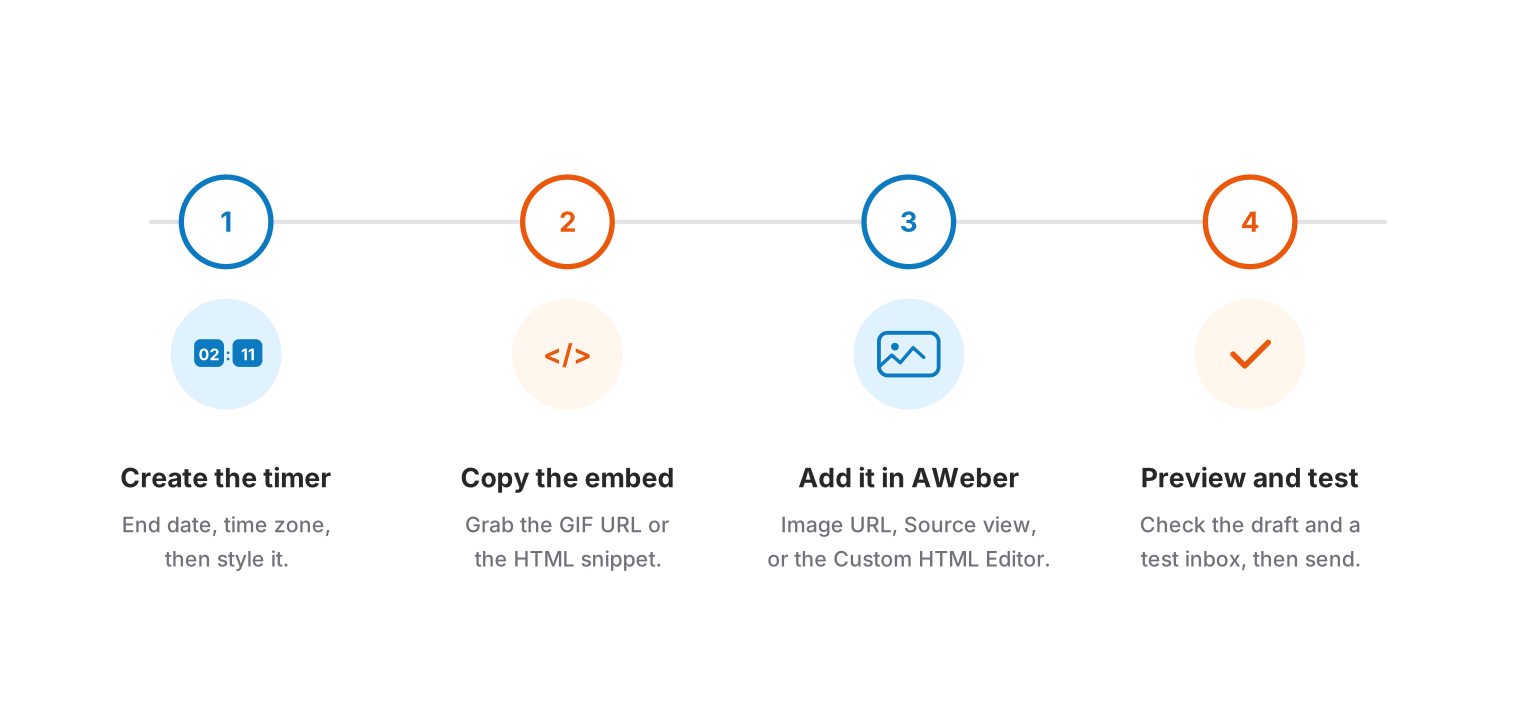
Build the timer once outside AWeber — from there it's a single paste in the message editor.
Step 1: Create the Timer in Countdown Builder
- Go to app.countdownbuilder.com and create a timer, or sign up free if you don't have an account yet.
- Set the end date, time, and time zone to the campaign's actual deadline. If the offer doesn't really end, leave the timer out — a countdown that resets or lies trains readers to ignore the next one.
- Design it. Pick a starting point from the 65+ templates, then adjust colors, fonts, and labels to match the campaign.
- Set expiry behavior — zeros, a message like "Offer ended," or a custom image for after the deadline. Details are on the expiry settings page.
- Copy both the GIF URL and the HTML embed. Which one you use depends on the route in Step 3.
Step 2: Create the Message in AWeber
- In AWeber, hover over the Messages tab and choose Drafts, then click Create a Message.
- Pick your editor:
- The drag-and-drop email builder — recommended for most messages. Blocks from the left sidebar (text, image, button, and more) stack into the layout. Routes A and B below live here.
- The Custom HTML Editor — from the same Create a Message dropdown, for complete control over the message's code. Route C.
Broadcasts and campaign (automation) messages use the same message editors, so all three routes work in either.
Step 3: Add the Timer to the Message
Three routes, and they're not interchangeable — the one you pick decides how much of the email is yours and whether the timer is clickable:
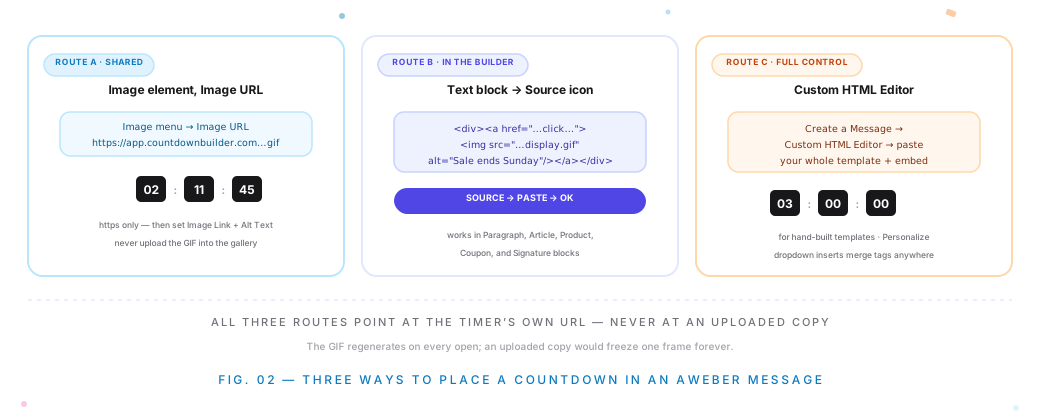
Route A is the fastest; B keeps the timer clickable inside the builder; C is for hand-built templates.
Route A — the Image element (shared deadline):
- Drag an Image block from the sidebar into the message where the timer belongs, then click the placeholder to open the Image menu.
- In the Image URL section, paste the timer's GIF URL — the direct link to the externally hosted image. Use the
https://URL exactly as copied; AWeber strongly suggests secure links only, and non-secure links risk being blocked or filtered. - Set the Image Alt Text (something like "Sale ends Sunday at midnight") and point the Image Link at your sale page — the field defaults to your website URL, so change it if the timer should click through somewhere specific.
Route B — a text block's Source view (clickable timer, still in the builder):
- Click a Paragraph block where the timer belongs (Article, Product, Coupon, and Signature blocks work the same way).
- Click the Source icon in the paragraph toolbar.
- Paste the timer's HTML embed in the popup and click OK.
AWeber's Source view strips a defined list of tags — script, style, iframe, form, and similar — for security. The timer's embed uses none of them: it's a plain div, anchor, and image, so it passes through intact. The win over Route A is the clickable timer: the embed wraps the countdown image in a link, so the click forwards to your page before the deadline and to your expiry URL after it.
Route C — the Custom HTML Editor (full templates):
- From Create a Message, choose Custom HTML Editor.
- Enter the subject line at the top, then paste your complete template into the editor — with the timer's embed wherever the countdown goes.
- Use Save & Exit when done, and Schedule when it's ready to send.
If you hand-build emails as full HTML documents, this is your route. It's also where AWeber's Personalize dropdown (top-right of the editor) earns its keep: click where a merge tag belongs, pick the subscriber field from the dropdown, and AWeber inserts the tag for you.
One Deadline Per Subscriber: the Merge-Tag Route
Everything above gives the whole list the same countdown. For per-subscriber deadlines — a trial end, a cart-hold expiry, an enrollment window — the dynamic timer accepts an endsAt parameter with a Unix timestamp in seconds (10 digits), and AWeber's merge tags can supply it:
- Store each subscriber's deadline as a custom field holding Unix seconds —
1760029200, not a formatted date. AWeber's personalization is straight substitution: whatever the field holds is what the tag outputs, with no date formatting or math available at send time. - In the Custom HTML Editor (or the Source view), append the parameter to the image URL and insert the tag via the Personalize dropdown rather than typing it from memory:
<img src="https://app.countdownbuilder.com/countdowns/<timer-id>/display.gif?endsAt={!deadline}" alt="Your offer ends soon" />
- If the field is missing on a subscriber, the parameter comes out empty and the timer falls back to the default date you saved with it — nobody gets a broken image. The prerequisite is the same as in Braze and Customer.io: the field has to exist on the subscriber before the message sends.
One AWeber-specific caution: the Source view can rewrite markup it considers dynamic, and AWeber's own docs recommend protecting dynamic content with HTML comments when moving between views. After inserting a merge tag, re-open the Source view once and confirm the tag survived intact — then send yourself a test.
The broader pattern — per-subscriber deadlines wired from your own data — is covered in Email Personalization Beyond First Name, and the SaaS lifecycle guide shows it running end to end for trial-expiry and renewal emails.
Where to Place the Timer in the Email
- Between the hero and the CTA. After the reader knows what the offer is, before they decide. A timer at the very top counts down to something the reader can't yet name.
- State the deadline in text as well. Some recipients block images. A line like "Offer ends Sunday, Nov 15 at 11:59 PM ET" survives without them, and the alt text covers the timer itself.
- One timer per email. Two clocks to two different deadlines in one email say only one thing: nothing here is real.
Step 4: Preview and Test
- Open the message preview and check the timer's placement, sizing, and design next to the rest of the email. AWeber's image sizing options (Thumbnail, Optimized, Original, or a custom width) apply to Route A — pick the size that matches your template's content width.
- Send a test to inboxes you control: Gmail, Outlook, and Apple Mail cover most lists. Apple Mail Privacy Protection prefetches images at delivery, so those opens may cache an earlier frame — Countdown Builder serves a static fallback for Apple MPP, so check how it reads. Outlook on Windows shows a GIF's first frame, which for a timer is a correct frozen snapshot.
- With a merge tag in the URL, the preview only proves the tag resolves — send the test to a subscriber (or test address on your list) whose custom field actually holds a value, and confirm the countdown matches their deadline.
- Schedule the broadcast, or let the campaign send.
FAQ
Does AWeber have a built-in countdown timer?
No. None of the message editors includes one. The standard approach is what this guide covers: a timer service generates an animated image at a URL, and the message pulls it in through the Image element's URL field, a text block's Source view, or the Custom HTML Editor.
Will the countdown update live?
It regenerates on every open, so each view shows the correct time remaining at that moment. It isn't a running clock inside the inbox — no email client allows that. Outlook on Windows renders the GIF's first frame; the count shown there is still accurate.
Why can't I just upload the timer GIF to the image gallery?
Because the gallery stores a copy. The uploaded file is one frozen frame — the countdown it shows is the moment you uploaded it, for every subscriber, forever. The Image URL field, the Source view, and the Custom HTML Editor all point at the timer service's live URL instead, which regenerates on every open. That's the difference between a timer and a picture of a timer.
Can I use merge tags with the timer?
Yes — in the Source view or the Custom HTML Editor, inserted via the Personalize dropdown. AWeber personalization is straight substitution, so the field must already hold the value you want (Unix seconds for endsAt). Test that the tag resolves inside the image URL with a draft before relying on it.
Final Thoughts
A countdown timer in an AWeber email is one paste: the Image element's URL field for a deadline the whole list shares, the Source view when the timer should be clickable, and the Custom HTML Editor for full hand-built templates. Build the timer against the real deadline, link it by URL — never upload the GIF — place it between the hero and the button, and test before sending.
If you want to try it, you can create a free email countdown timer — the free plan needs no credit card and adds no watermark.
Related Guides
- How to Add a Countdown Timer to a Campaign Monitor Email
- How to Add a Countdown Timer to a Customer.io Email
- How to Add a Countdown Timer to a Braze Email
- How to Add a Countdown Timer in Keap Broadcast Emails
- Email Personalization Beyond First Name: Dynamic Countdown Timers
- Email Countdown Timer Not Working? 7 Causes and Fixes
Last updated: November 2026. The AWeber steps above reflect the message editors as of this date; AWeber evolves its interface, so exact labels may drift. Countdown Builder features and pricing reflect the product at the time of publication and can change — see the pricing page for current plans.
Written by Mehedi Hasan
Writer & Developer. He writes about email marketing, countdown timers, and campaign design.
Connect on LinkedIn