
How to Add a Countdown Timer in Keap Broadcast Emails (2026 Guide)
 By Mehedi Hasan
A Keap broadcast promoting a limited-time offer, a webinar registration deadline, or a seasonal campaign often needs the deadline shown directly in the email. A timer in Keap broadcasts does that.
Keap (formerly Infusionsoft) has a native Timer block, but it offers limited design flexibility. With Countdown Builder, you can set custom colors, fonts, multilingual labels, animations, and timer types, all embedded via a simple HTML block (Keap's broadcast email builder guide).
Countdown Builder supports multilingual labels, so you can translate "Days", "Hours", "Minutes", and "Seconds" into any language, or use your own custom wording.
What a Custom Timer Provides in Keap Broadcasts
Compared with Keap's native Timer block, a Countdown Builder timer adds:
- Custom colors, fonts, backgrounds, and animations
- Multilingual or custom labels for Days, Hours, Minutes, and Seconds
- Fixed-date and evergreen timer types
- A post-expiration message or image
- No watermark, including on the free plan
A timer is worth adding when the deadline is real. If the offer does not actually expire, the timer costs trust rather than earning attention.
Step-by-Step: How to Add a Timer in Keap Broadcasts Using Countdown Builder
Keap broadcasts deserve extra testing, so the flow includes a check before scheduling:
flowchart LR
    A["Create the timer in Countdown Builder"] --> B["Open Comms, then Email Broadcasts"]
    B --> C["Drag an HTML block in the New Email Builder"]
    C --> D["Paste the timer code"]
    D --> E["Test the broadcast thoroughly"]
    E --> F{"Renders in preview sends?"}
    F -- Yes --> G["Schedule the broadcast"]
    F -- No --> H["Check the pasted HTML"]
    H --> D
Step 1: Create Your Countdown Timer on Countdown Builder
Go to the countdown create page and log in, or start with a free account. Choose from 65+ templates and click Create.
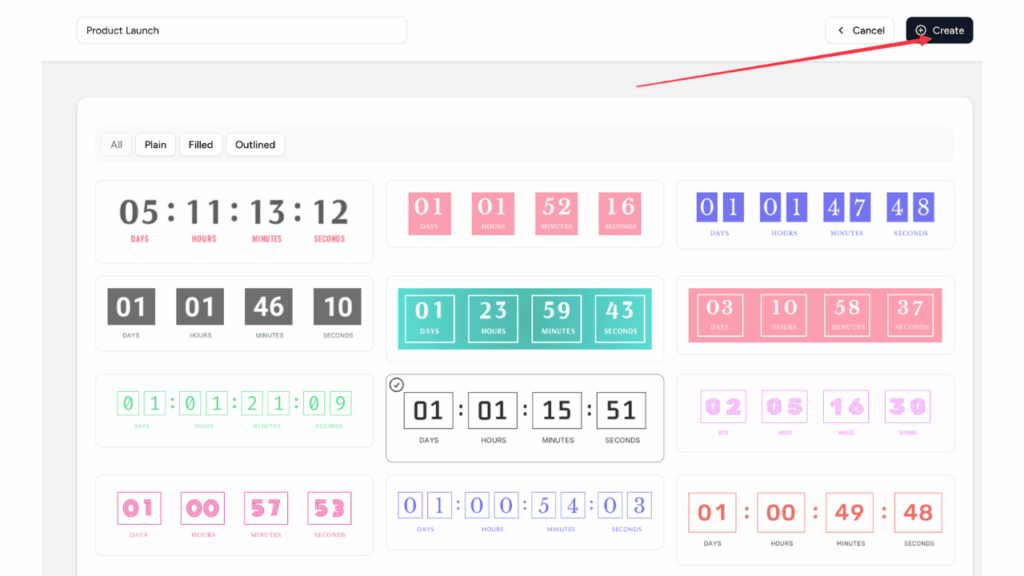
Customize the timer:
- Set the end date/time and time zone
- Pick fixed-date or evergreen (a per-recipient deadline, for broadcasts sent over time)
- Change colors, fonts, background, and animations
- Multilingual labels — replace "Days" with "Tage", "Jours", "Días", or any custom text
- Add an expiry message or image
Preview as you go.
Step 2: Copy the HTML Code
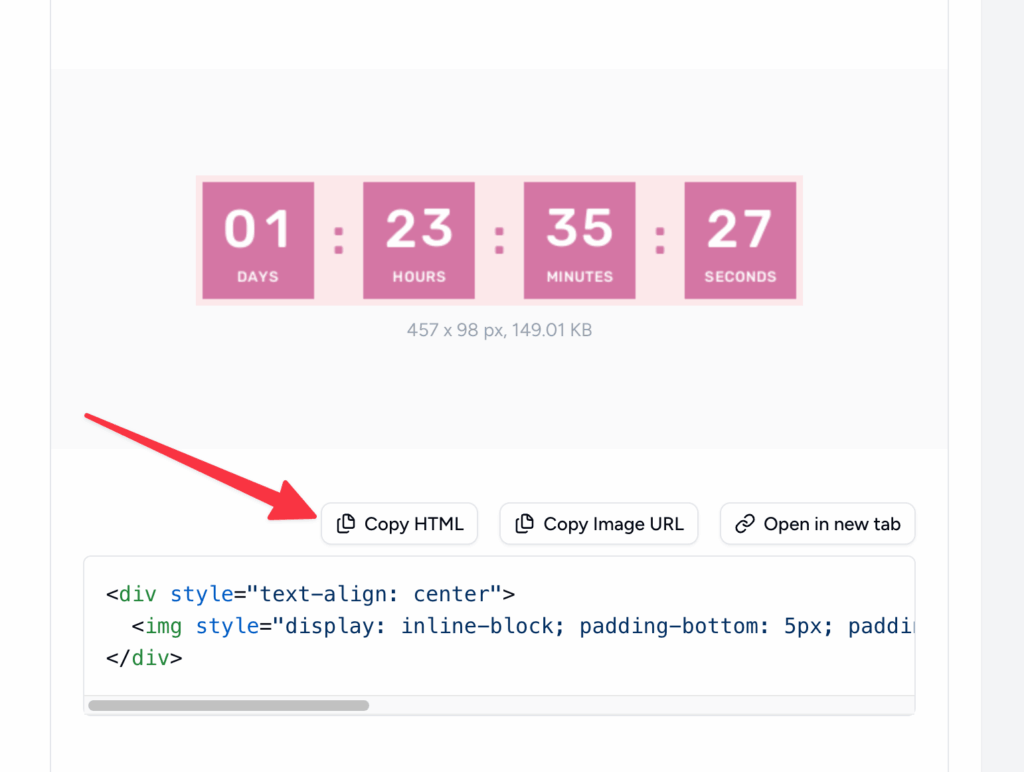
When the preview looks right, click Copy HTML to copy the full embed code.
Step 3: Add the Timer to Your Keap Broadcast
In Keap, go to Comms → Email Broadcasts and create or edit a broadcast using the New Email Builder. Drag an HTML block into your email layout.
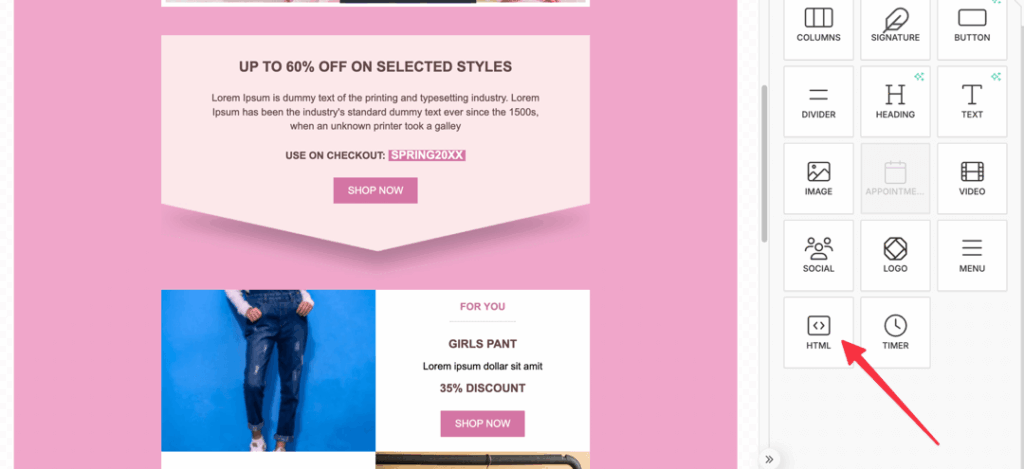
Paste the Countdown Builder HTML code. Save and preview.
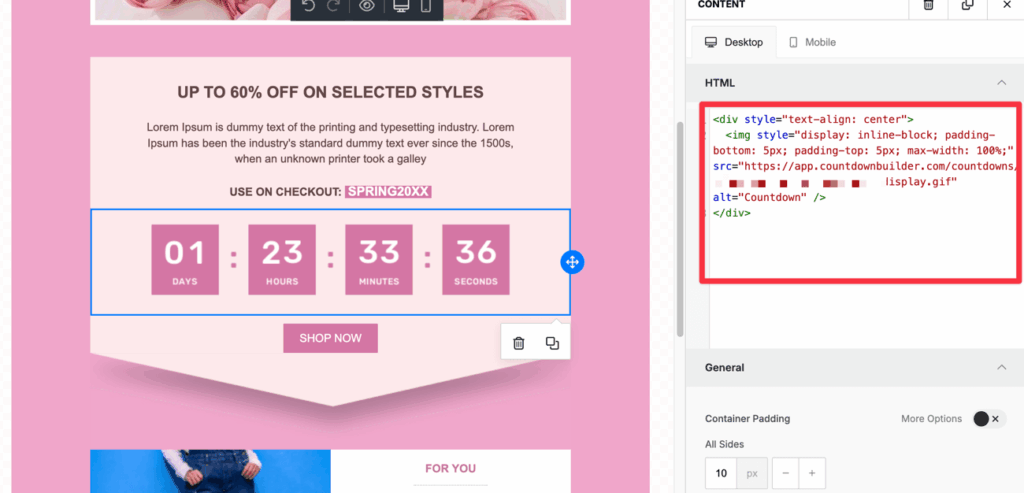
Your countdown timer is now embedded in the Keap broadcast.
Step 4: Test Thoroughly
- Send test emails to yourself
- Check on desktop and mobile (Gmail, Outlook, Apple Mail)
- Confirm the timer animates and the labels display correctly in your language(s)
Best Practices for Timers in Keap Broadcasts
- Place the timer right above or beside your main CTA
- Use multilingual labels when sending to international lists
- Pair with subject lines that state the actual deadline, such as "Only 48 hours left"
- Make sure the offer really expires when the timer reaches zero
- Test custom HTML rendering — Keap handles it well, but always preview
Countdown Builder vs. Keap's Native Timer Block
| Feature | Keap native Timer | Countdown Builder |
|---|---|---|
| Custom colors & fonts | Limited | Yes |
| Multilingual / custom labels | No | Yes — any language or text |
| Evergreen timers | No | Yes |
| Pulsing animations | Basic | Yes |
| Background images | No | Yes |
| Watermark | — | None, including the free plan |
Feature availability can change on both platforms. Verify current options before deciding which to use.
If you'd like to try it, you can create a free email countdown timer. The free plan doesn't require a credit card and doesn't add a watermark to the timer.
Related Guides
Last updated: September 2026. The steps above reflect Countdown Builder and the Keap email builder at the time of updating. Product features and pricing can change, so verify current details before making changes to your workflow.
Written by Mehedi Hasan
Writer & Developer. He writes about email marketing, countdown timers, and campaign design.
Connect on LinkedIn