
How to Add a Countdown Timer in Mailchimp Emails
 By Mehedi Hasan
Mailchimp doesn't include a built-in countdown timer, but its email builder supports custom HTML, so you can embed one generated by a timer service. This tutorial walks through the process in Mailchimp using Countdown Builder, the timer service this blog is published by.
The steps cover creating the timer, copying its HTML, adding it to a campaign with a Code block, and testing the result before you send.
When a Countdown Timer Fits a Mailchimp Campaign
A countdown timer shows subscribers how much time remains before a sale, event, or registration period ends. It's a reasonable addition when the deadline is real.
Countdown Builder offers three timer types:
- Fixed-date timers — one deadline for every recipient.
- Evergreen timers — the countdown starts individually when each recipient opens the email.
- Dynamic timers — a per-recipient deadline passed in through a merge tag.
If the campaign has no genuine deadline, a timer adds noise rather than information.
How to Add a Countdown Timer in Mailchimp Emails
Here is the full workflow at a glance:
flowchart LR
    A["Create the timer in Countdown Builder"] --> B["Open your Mailchimp campaign"]
    B --> C["Drag in a Code block"]
    C --> D["Paste the timer HTML"]
    D --> E["Preview and test"]
    E --> F{"Timer renders and counts down?"}
    F -- Yes --> G["Launch the campaign"]
    F -- No --> H["Re-copy the HTML snippet"]
    H --> D
Step 1: Create the Timer in Countdown Builder
- Visit Countdown Builder and sign in or create a free account.
- Design a timer for your campaign. You can customize:
- Colors and backgrounds
- Fonts and labels such as "Days" and "Hours," including other languages (for example, "Días," "Horas")
- End date, time zone, and animations such as pulsing separators
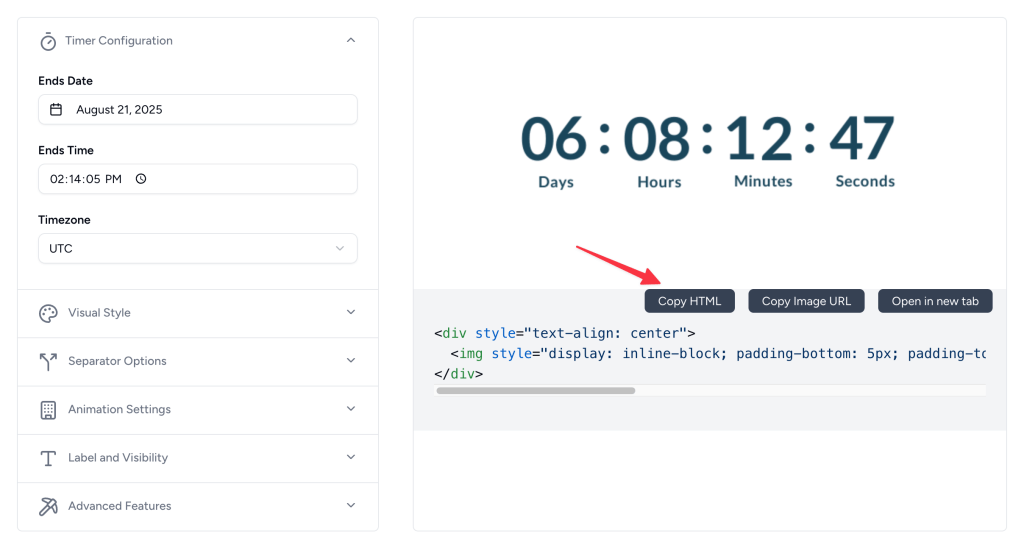
- When the timer is ready, click Copy HTML to copy the generated code.
Step 2: Open Your Mailchimp Campaign
- Log in to your Mailchimp account.
- Go to the Campaigns section and select or create a new email campaign.
- Open the Email Designer (Classic Builder) to edit your email template. The Code block used in the next step is available in the classic builder.
Step 3: Insert a Code Block
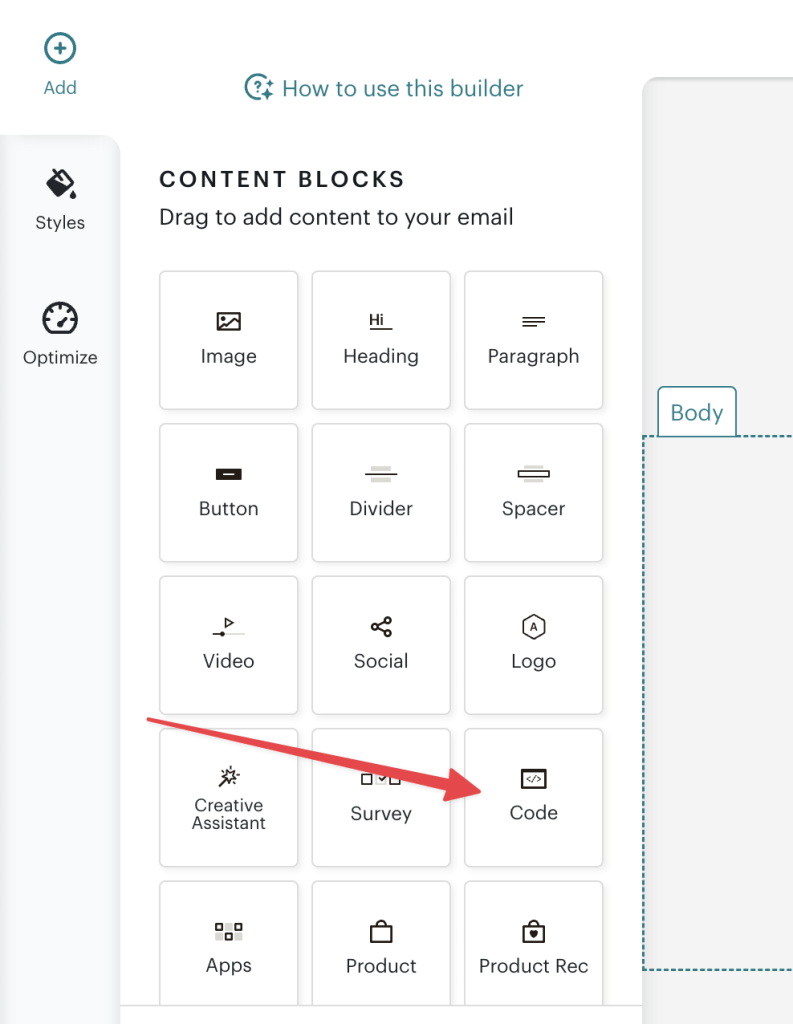
- In the Mailchimp email builder, find the Content section in the right-hand toolbar.
- Drag the Code block to the position in the template where the timer should appear — commonly just above the call-to-action button.
Step 4: Embed the Countdown Timer
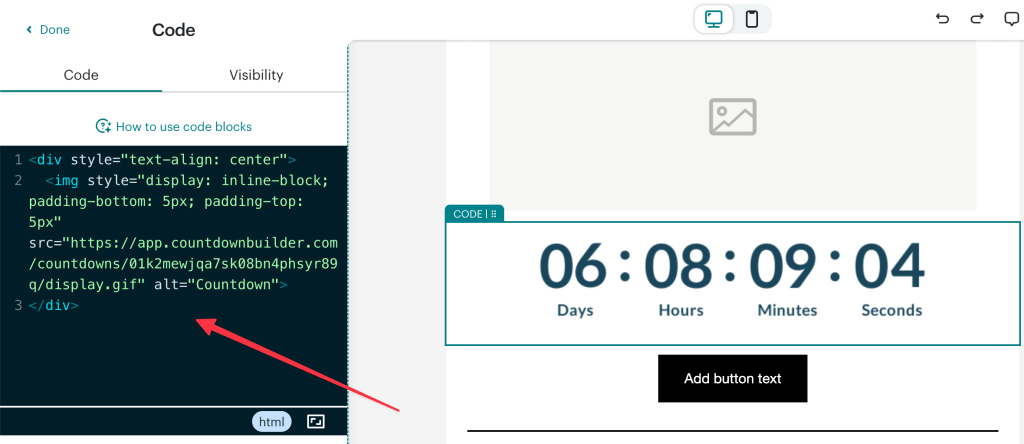
- Click the Code block to open the code input area.
- Paste the HTML you copied from Countdown Builder.
- Click Save & Close, or the equivalent save button in your version of the editor.
Step 5: Preview and Test
- Use Mailchimp's Preview feature to check that the timer displays correctly and fits your layout.
- Send a test email to yourself and open it on the devices and clients your subscribers use — for example Gmail, Outlook, and Apple Mail on mobile and desktop.
- Adjust the timer's size or placement if needed.
Step 6: Launch Your Campaign
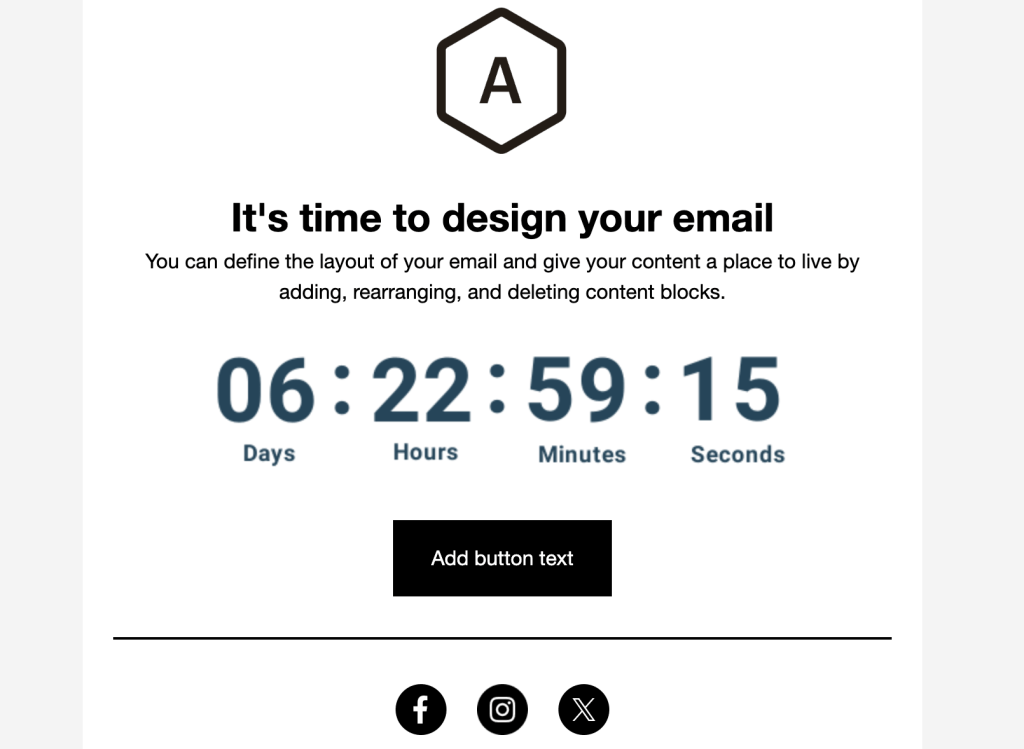
Save the email and schedule or send it. Each time a subscriber opens the email, the timer image is regenerated with the current time remaining.
Best Practices for Mailchimp Countdown Timers
- Use timers for genuine deadlines. Flash sales, webinar start times, and registration cutoffs are good fits. A timer on an offer that never expires erodes trust.
- Place the timer near your CTA. Readers act at the button, so put the deadline next to it.
- Match your email's design. Customizing the timer's colors and fonts keeps the email looking consistent.
- Check mobile. A large share of opens happen on phones; confirm the timer is readable without zooming.
- A/B test. Compare designs and placements — or an email with and without a timer — before rolling out to the full list.
Email Client Notes
Countdown timers are delivered as animated GIF images, and email clients treat them like any other image:
- Image blocking. Some subscribers block images by default. Keep the deadline in plain text as well ("Offer ends Friday at midnight") and write alt text that carries the same message.
- Classic Outlook on Windows — the desktop app built on Word's rendering engine, from Outlook 2007 through the classic Microsoft 365 client — doesn't animate GIFs and shows the first frame. New Outlook for Windows, Outlook on the web, Mac, and mobile animate normally. The Outlook countdown timer guide covers each version and how to design for the still frame.
- Apple Mail Privacy Protection (MPP) pre-fetches and caches remote images, which can freeze an animated timer at the moment it was cached. Countdown Builder serves a static fallback when the animated GIF can't be refreshed; if a meaningful share of your list uses Apple Mail, check how your timer service handles this.
Countdown Builder and Mailchimp
Countdown Builder supports fixed-date, evergreen, and dynamic timers, with 65+ templates and customization for colors, fonts, backgrounds, and multilingual labels. Timers are served as animated GIFs that regenerate on each open, and the HTML works with Mailchimp's Code block and other ESPs.
Mailchimp plans scale with your contact count; the timer side doesn't. Countdown Builder is a flat rate per account — no watermark on the free plan, unlimited timers and views on paid plans, and a custom domain with SSL on Business for serving timer images from your own subdomain. Current plan details are on the pricing page.
Final Thoughts
Mailchimp campaigns can carry a countdown timer through a Code block: build the timer, copy the HTML, paste, test, send. The timer earns its place when the deadline is real; for everything else, plain copy does the job.
If you'd like to try it, you can create a free timer. The free plan doesn't require a credit card and doesn't add a watermark.
Last updated: September 2026. The Mailchimp steps above reflect the classic campaign builder as of this date; Mailchimp's interface changes over time, so the exact labels may differ. Countdown Builder features and pricing reflect the product at the time of updating and can change — check the pricing page for current details.
Written by Mehedi Hasan
Writer & Developer. He writes about email marketing, countdown timers, and campaign design.
Connect on LinkedIn