
How to Add a Countdown Timer to a SendGrid Email Campaign
 By Mehedi Hasan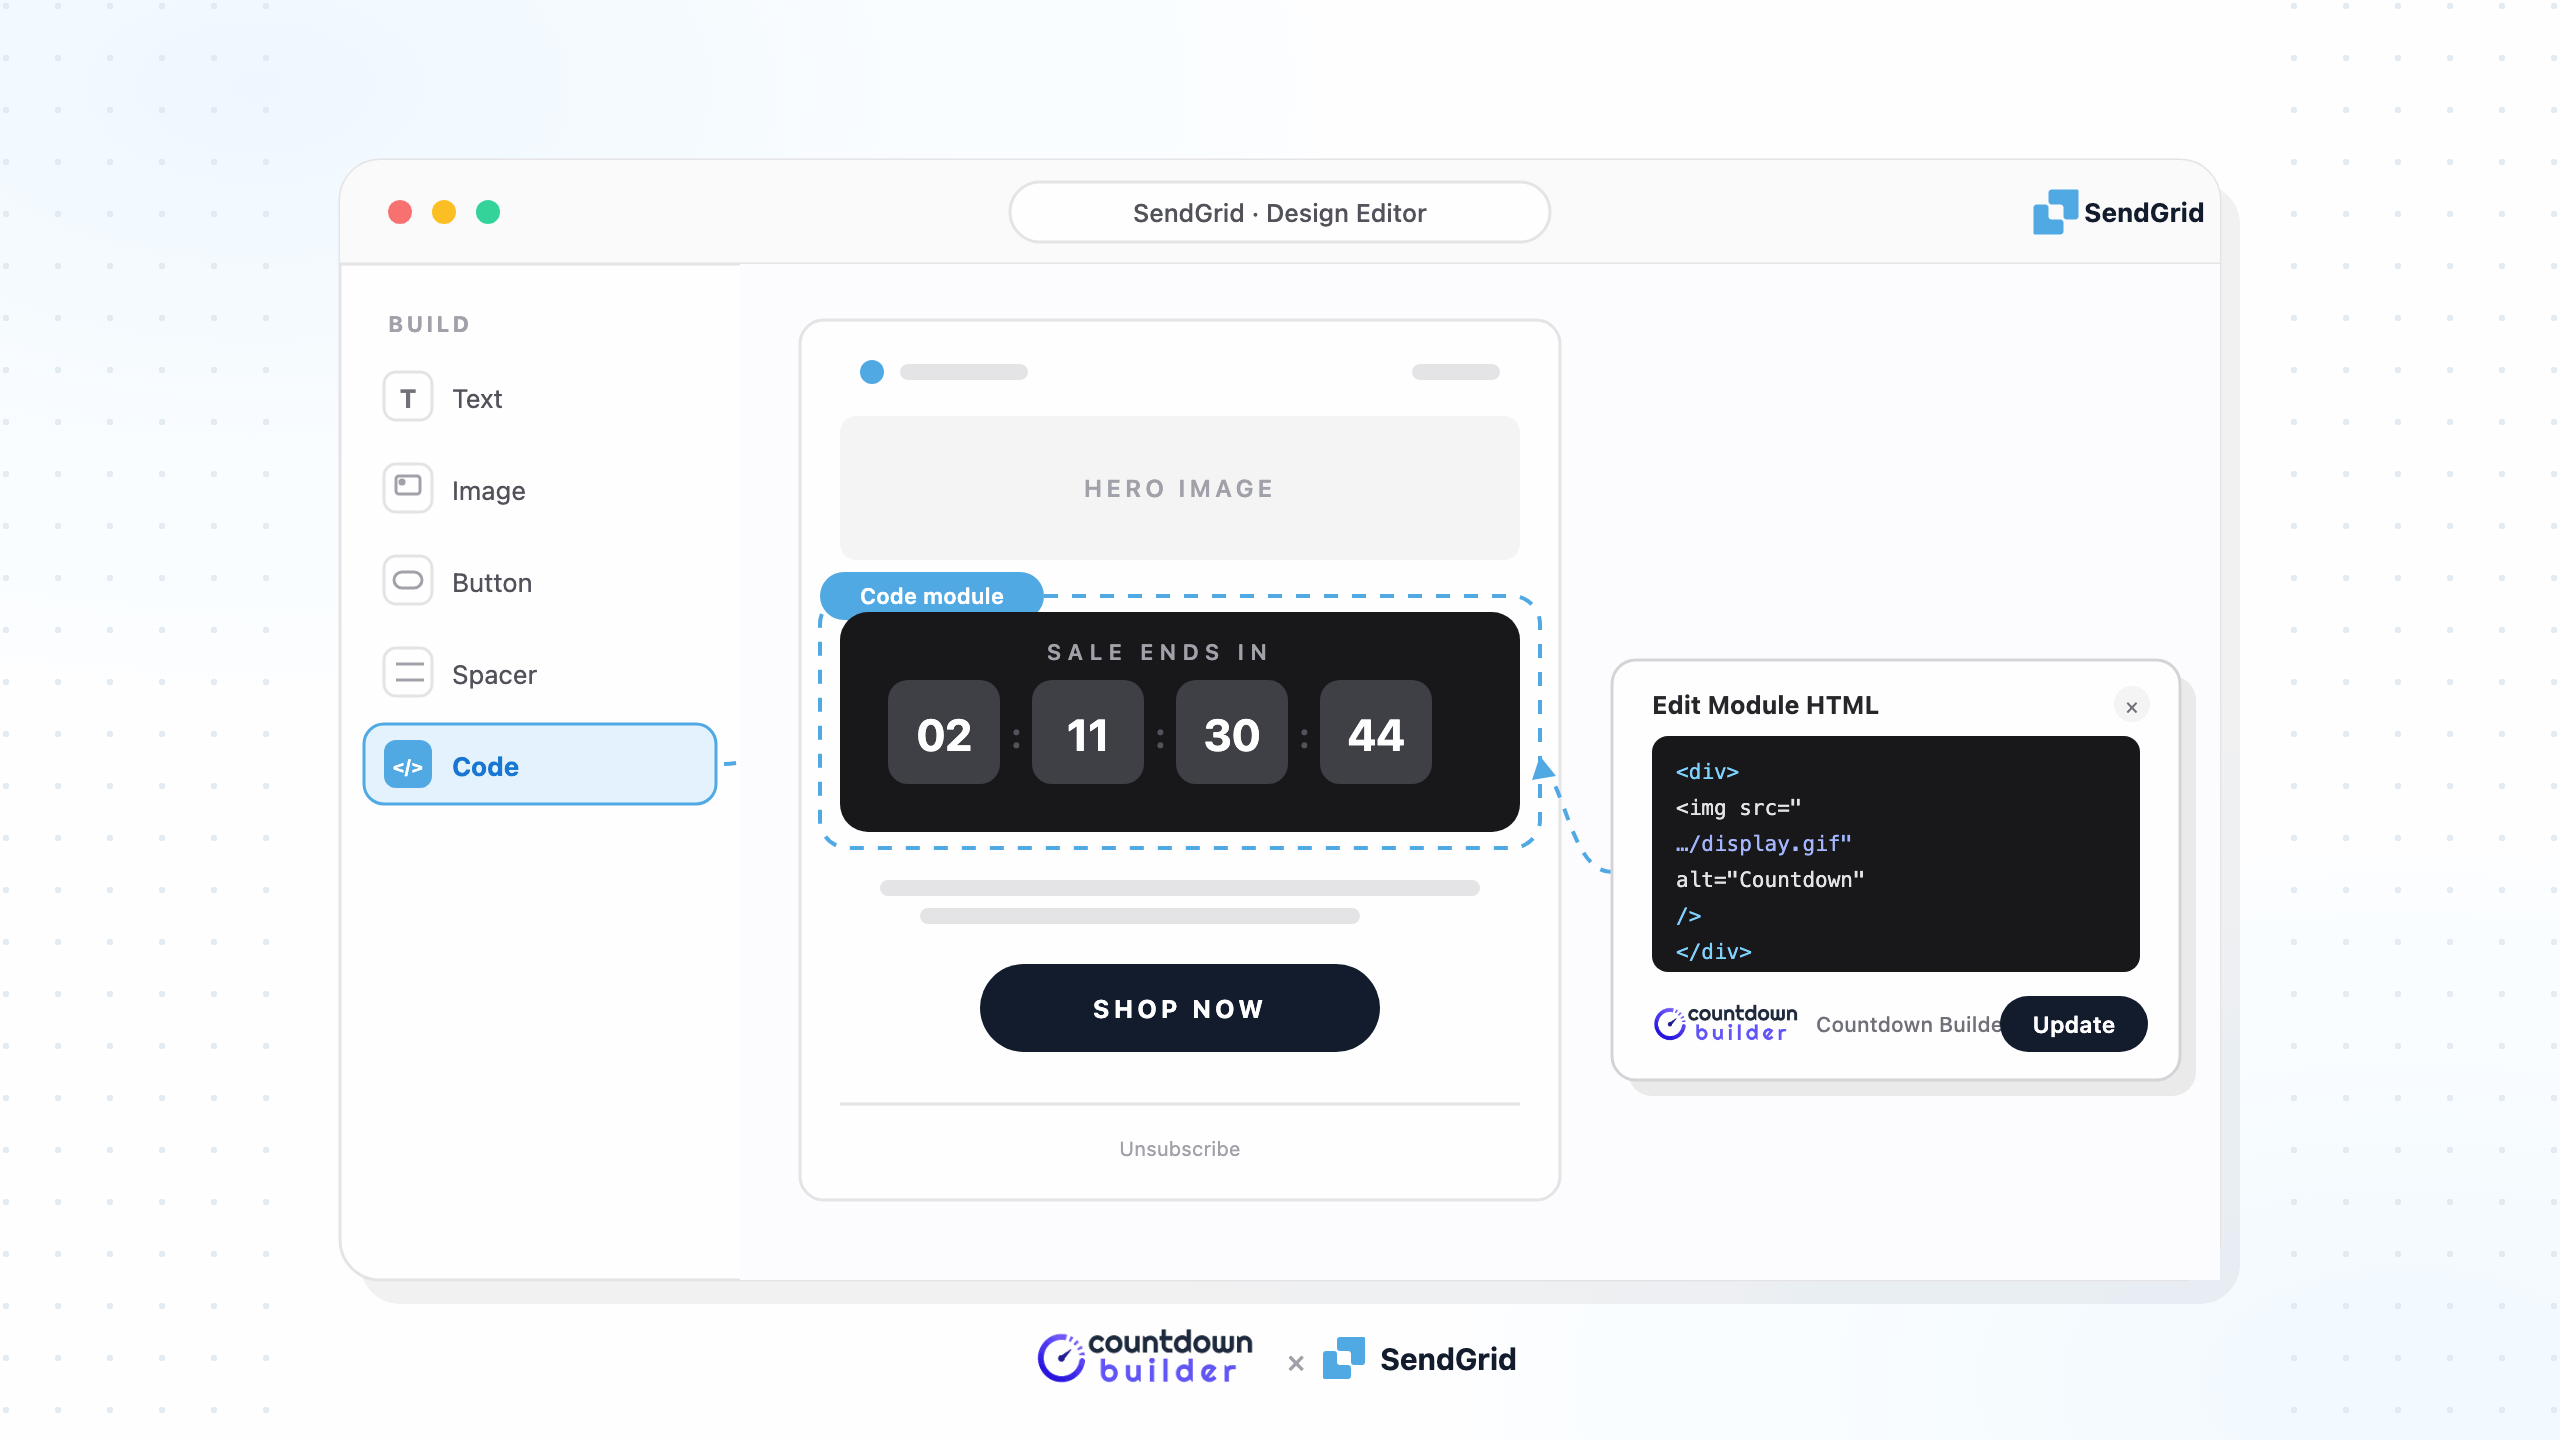
SendGrid's campaign builder — Marketing Campaigns — has a drag-and-drop Design Editor with a Code module: a block that accepts raw HTML. That single module means a countdown timer generated as an image-based embed can be pasted straight into a flash sale, product launch, or registration-deadline campaign.
This tutorial walks through the process with Countdown Builder, the timer service this blog is published by: build the timer, copy the HTML, add a Code module in SendGrid, and test the result.
How Email Countdown Timers Work
Email clients strip JavaScript, so a timer can't run live code inside the inbox. Timer services solve this by rendering the countdown as an animated image. When a recipient opens the email, the image loads with the correct time remaining at that moment — no script required.
That is also why the timer's end date and time zone matter so much: the image is generated from the deadline you configured, so the countdown is only as accurate as the settings behind it.
What You Need
- A SendGrid account with Marketing Campaigns — campaign emails live under Marketing > Single Sends (SendGrid calls one-off campaign emails Single Sends)
- A Countdown Builder account (the free tier works) and a timer set to your campaign's real end date
- A design built in the Design Editor, or a full-HTML template for the Code Editor — both accept the embed
The Flow at a Glance
Four steps, start to send:
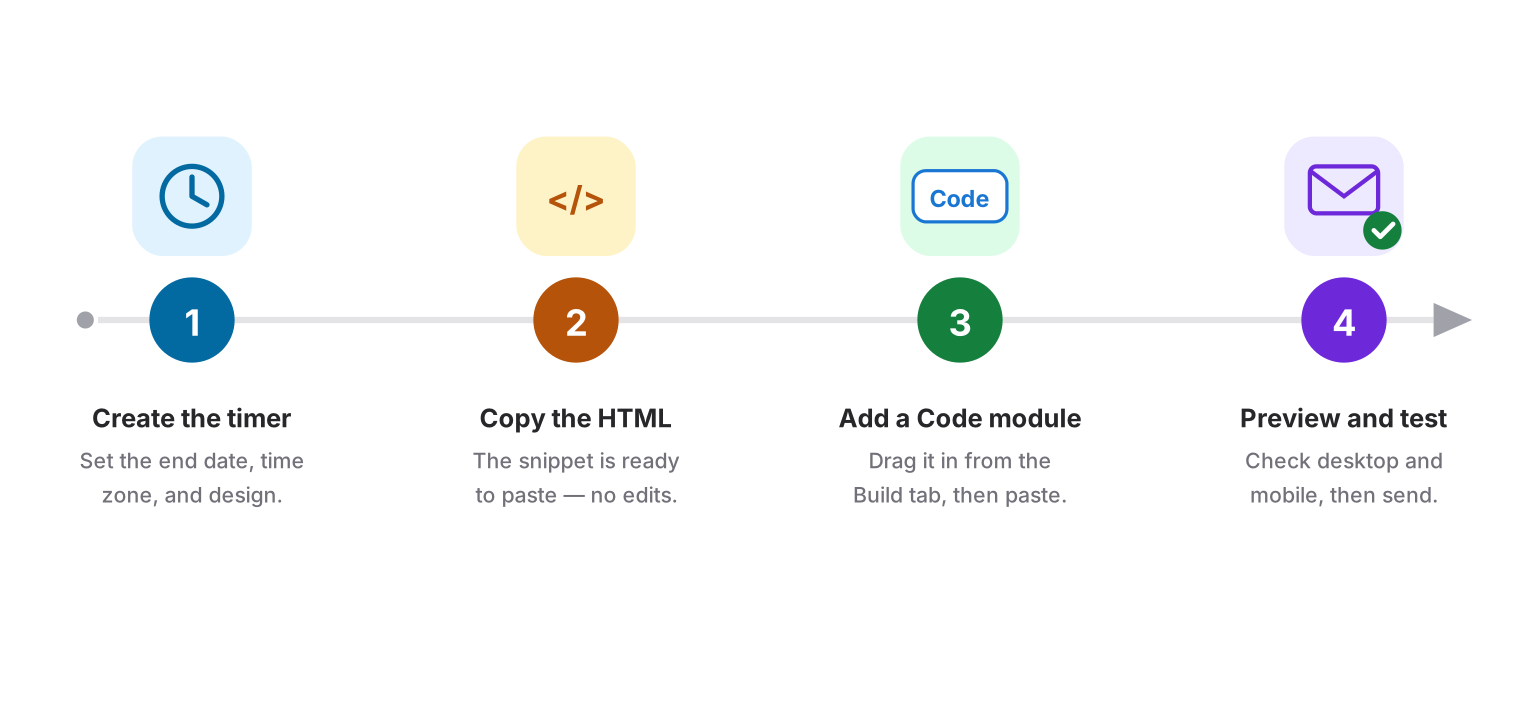
Build the timer outside SendGrid, then paste its embed code into the campaign — the same snippet works in every email you send for that deadline.
Step 1: Create the Timer in Countdown Builder
- Go to app.countdownbuilder.com and create a timer, or sign up free if you don't have an account yet.
- Set the end date, time, and time zone. This is the deadline your whole campaign hangs on — a flash sale that ends Friday at midnight should have a timer that ends Friday at midnight.
- Design the timer. Start from one of the 45+ templates and adjust colors, fonts, and labels until the timer matches your brand.
- Set expiry behavior. Decide what recipients see after the deadline passes — zeros, a custom message like "Offer ended," or a custom image. The options are described on the expiry settings page.
- Copy the HTML for the timer. This is the snippet SendGrid will display.
Step 2: Start a SendGrid Campaign
- In SendGrid, go to Marketing > Single Sends and click Create Single Send.
- Pick a starting point — one of your saved email designs or one of SendGrid's pre-built designs.
- When prompted, choose the Design Editor. (If you build campaigns as full HTML, the Code Editor works too — see Step 3.)
The Design Editor opens with the Settings, Tags, and Build tabs on the left, and the modules that make up your email in the center.
Step 3: Add a Code Module and Paste the Embed
- Open the Build tab, then click, drag, and drop the Code module into the email where the timer should appear — usually below the header or hero image. The Edit Module HTML panel opens.
- Paste the HTML you copied from Countdown Builder into the box. The snippet is generated ready to use — no editing needed. If you want the timer clickable, set the destination link in the timer's settings in Countdown Builder; clicks on the timer image then go straight to your sale page.
- Click Update. The timer renders in the preview immediately.
SendGrid doesn't validate the HTML inside a Code module — it takes whatever you paste — so it pays to preview before sending. If you're working in the Code Editor instead, the same snippet drops straight into your HTML wherever the timer belongs.
Step 4: Preview and Send a Test
- Click Preview and check the email at desktop and mobile widths — the timer should span the content column without overflowing.
- Send a test to inboxes you control: Gmail, Outlook, and Apple Mail cover the clients most of your list uses. Give Apple Mail a specific look — its Mail Privacy Protection caches remote images, and Countdown Builder serves a static fallback when the animated timer can't refresh, so check how that fallback reads.
- Confirm the timer shows the correct time remaining, and check what the expiry setting will display once the deadline passes.
- Schedule or send the campaign.
Countdown Builder's timers are animated images that regenerate each time the email is opened, so a subscriber who opens the email two days later still sees an accurate countdown — until the deadline, when your expiry setting takes over.
Where to Place the Timer in the Email
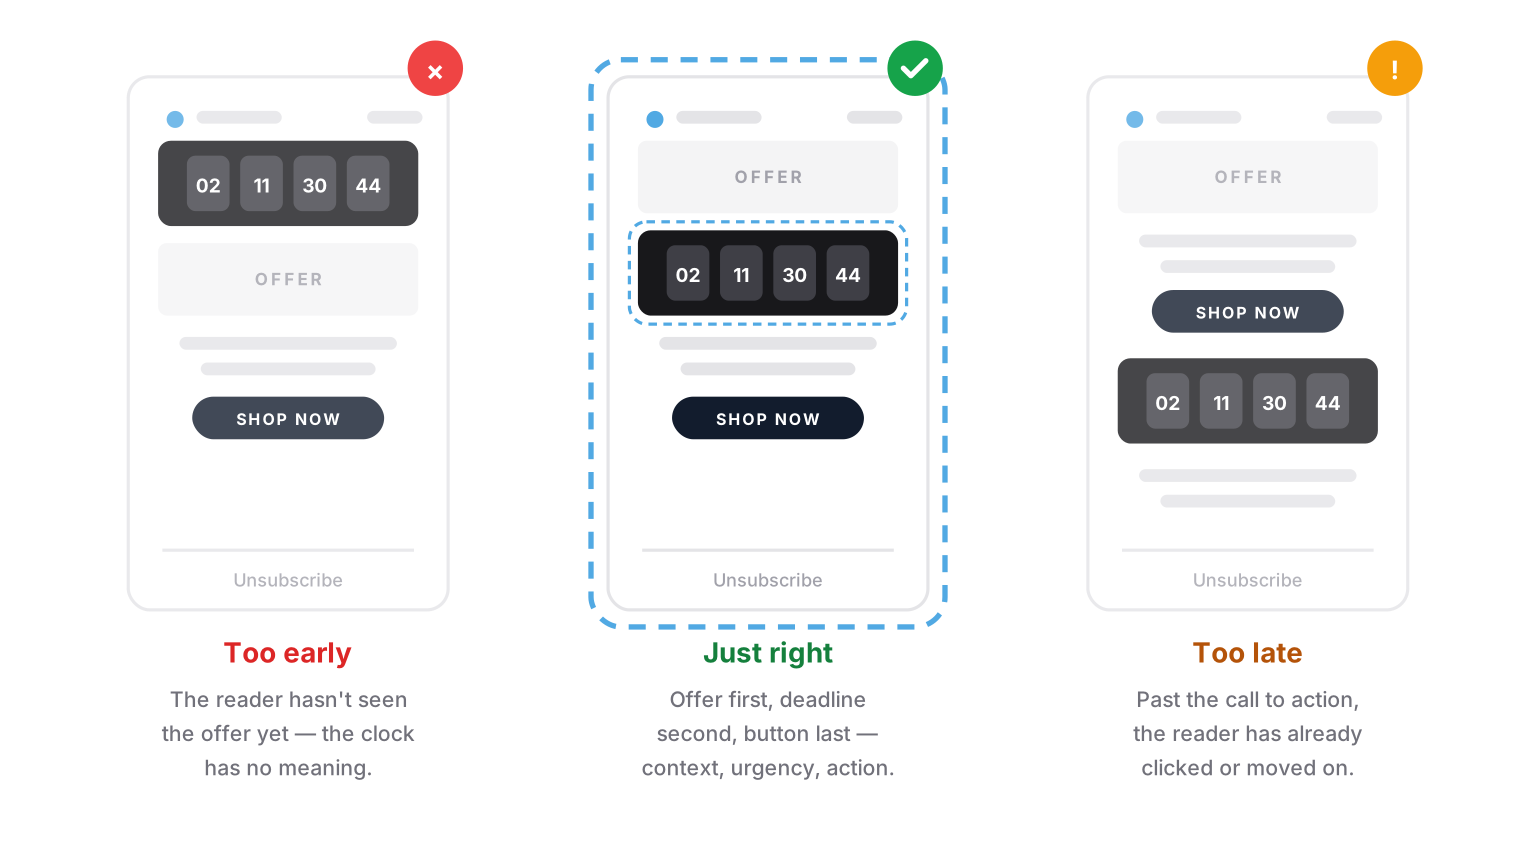
The timer sits between the announcement and the button — after the reader knows what the offer is, before they decide.
- Between hero and CTA. The hero explains the offer, the timer shows how long it lasts, the button closes the loop. This order converts better than a timer at the very top with no context.
- State the deadline in text as well. Some recipients block images by default. A line like "Offer ends Friday, Nov 27 at 11:59 PM" survives without them, and descriptive alt text covers the timer itself.
- One timer per email. Two clocks counting to two different deadlines in one email communicate nothing except confusion.
FAQ
Does SendGrid have a built-in countdown timer?
No. SendGrid's editors don't include one. The standard approach is what this tutorial covers: a timer service generates an animated GIF with an HTML embed, and the Code module places it in the campaign.
Will the countdown update live?
The timer is an animated image that regenerates each time the email is opened, so every open shows the correct time remaining. It is not a running clock inside the inbox — email clients don't allow that — but it is accurate on every open, which is what matters.
Can I reuse the timer across campaigns?
Yes. Embed the same snippet in every Single Send tied to that deadline, and each email shows the correct remaining time. To move the deadline, update the timer in Countdown Builder once — every email carrying the snippet follows. Saving the email as a design in SendGrid also preserves the module for future sends.
Do timers work in SendGrid automations?
Yes — automated series use the same editors as Single Sends, so the Code module is available there too. A welcome sequence or abandoned-cart automation can carry a timer the same way a one-off campaign does, provided the deadline is real.
Final Thoughts
Adding a countdown timer to a SendGrid campaign comes down to one module: Code. Build the timer against the campaign's real deadline, paste the snippet between the hero and the button, state the deadline in text, and test before sending. The timer does the rest — accurately, on every open, until the offer actually ends.
If you want to try it, you can create a free timer — the free plan needs no credit card and adds no watermark.
Related Guides
- How to Increase Email Urgency with Countdown Timers and End-Time Messages
- Product Promotion Email Template with Countdown Timer
- How to Boost Flash Sale Conversions with an Email Countdown Timer
- Countdown Timers for Holiday Campaigns: A Practical Guide
- The Psychology of Scarcity: Why Countdown Timers Actually Increase Sales
Last updated: October 2026. The SendGrid steps above reflect Marketing Campaigns as of this date; SendGrid's interface changes over time, so the exact labels may differ. Countdown Builder features and pricing reflect the product at the time of publication and can change — see the pricing page for current plans.
Written by Mehedi Hasan
Writer & Developer. He writes about email marketing, countdown timers, and campaign design.
Connect on LinkedIn