How to Set Up a Custom Domain from Cloudflare with Countdown Builder
 By Mehedi Hasan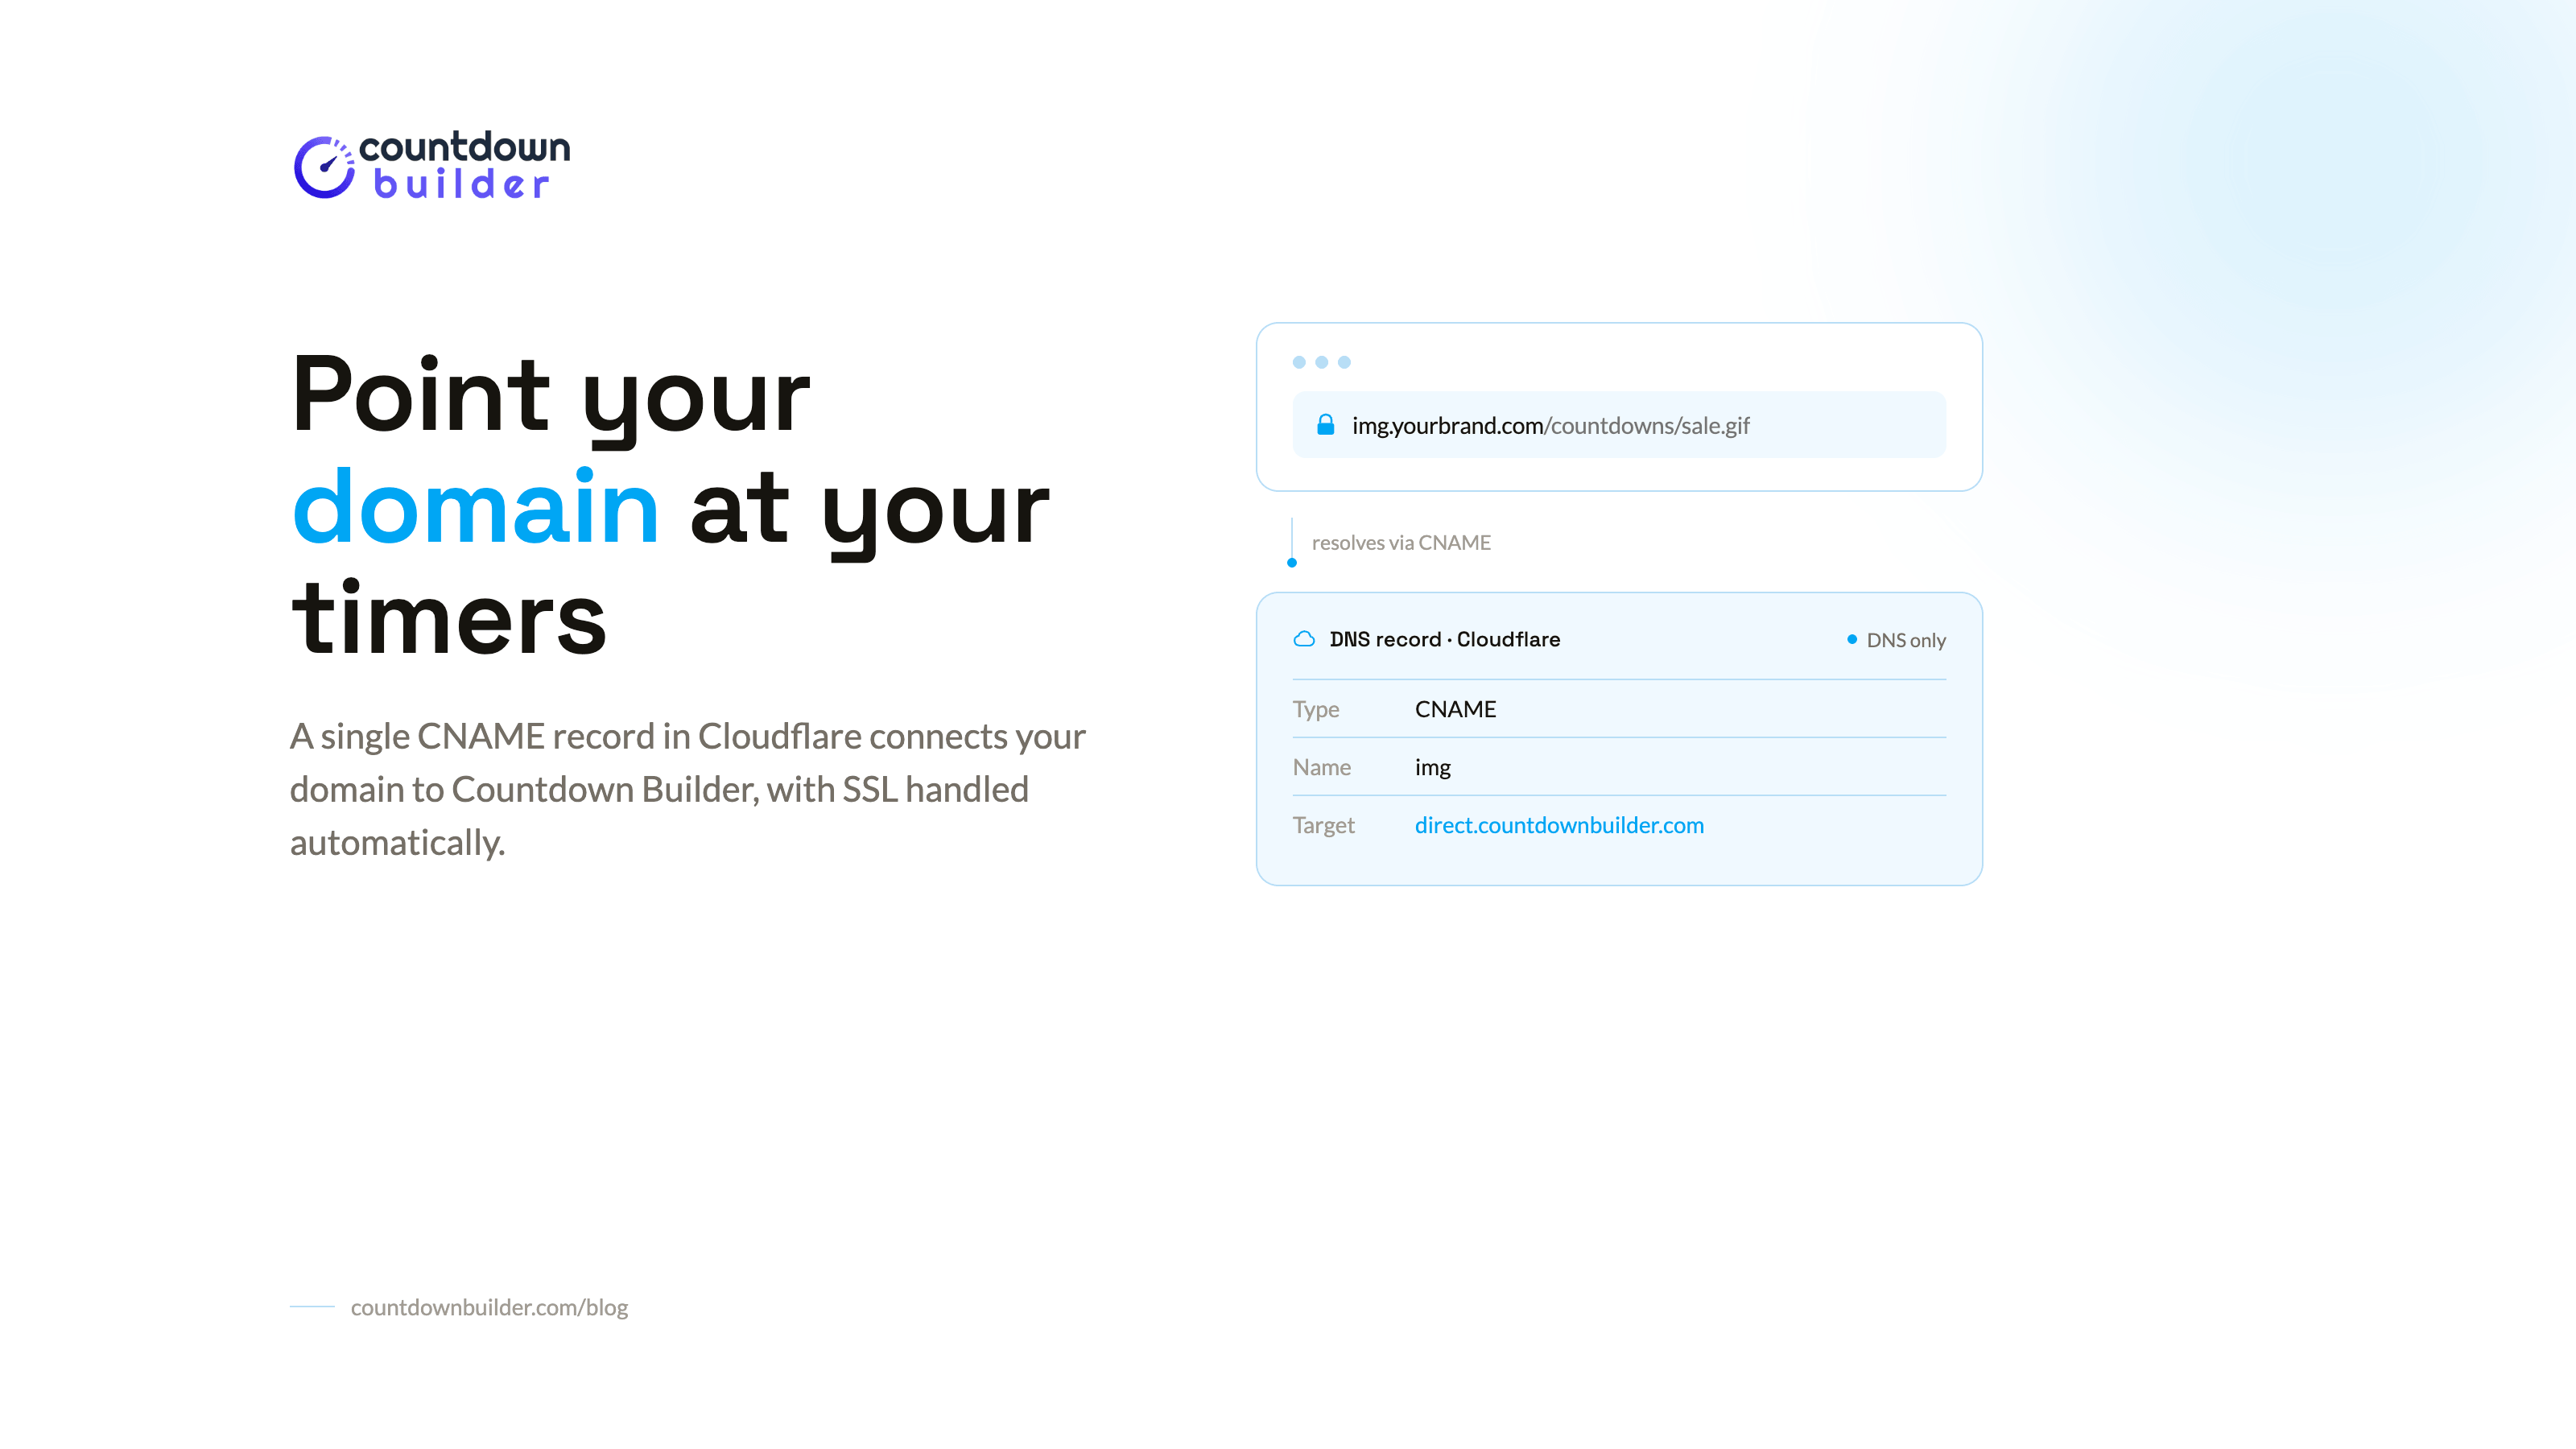
Want true white-label countdown timers that load from your domain (e.g., timer.ogdynamic.com) instead of a third-party one? Countdown Builder's custom domain feature makes this simple with a single CNAME record. When your domain is managed in Cloudflare, the process is straightforward and takes just a few minutes.
This guide shows exactly how to connect a Cloudflare-hosted domain (or subdomain) to Countdown Builder so your email countdown timers and website timers serve from a branded URL with automatic SSL. The result: better deliverability, stronger brand consistency, and no third-party domain visible in your campaigns.
Why Use a Custom Domain with Countdown Builder?
By default, timers load from Countdown Builder's domain. With a custom domain:
- Timer image and click URLs match the domain you send emails from (e.g.,
timer.ogdynamic.com/countdowns/<timer-id>.gif). - SSL certificates are provisioned and auto-renewed automatically—no purchase or installation needed.
- Domain consistency improves inbox placement. Inbox providers treat remote images from unrelated domains as potential trackers; matching your sender domain helps campaigns land in the inbox and load reliably.
- Fully white-label experience for agencies, ecommerce brands, and brand-sensitive senders.
Custom domains are included with the Business plan. A subdomain (such as timer, img, or cdn) is recommended so your root domain, website, and email sending remain untouched.
How Custom Domains Improve Email Deliverability
When you send emails with countdown timer images hosted on a third-party domain, inbox providers like Gmail and Outlook may flag these as potential tracking pixels. By serving timers from your own branded subdomain, you:
- Reduce spam flagging — consistent domain signals tell inbox providers you're a legitimate sender
- Improve image loading — some email clients block images from unknown domains; your own domain avoids this
- Build brand recognition — subscribers see your domain in every image URL, reinforcing trust
Prerequisites
Before you begin, make sure you have:
- An active Countdown Builder account on the Business plan.
- A domain already added to Cloudflare (you manage DNS there).
- Access to the Cloudflare dashboard and your Countdown Builder dashboard.
- A free subdomain name ready (e.g.,
timer,img, orcdn).
Step 1: Add Your Domain in Countdown Builder
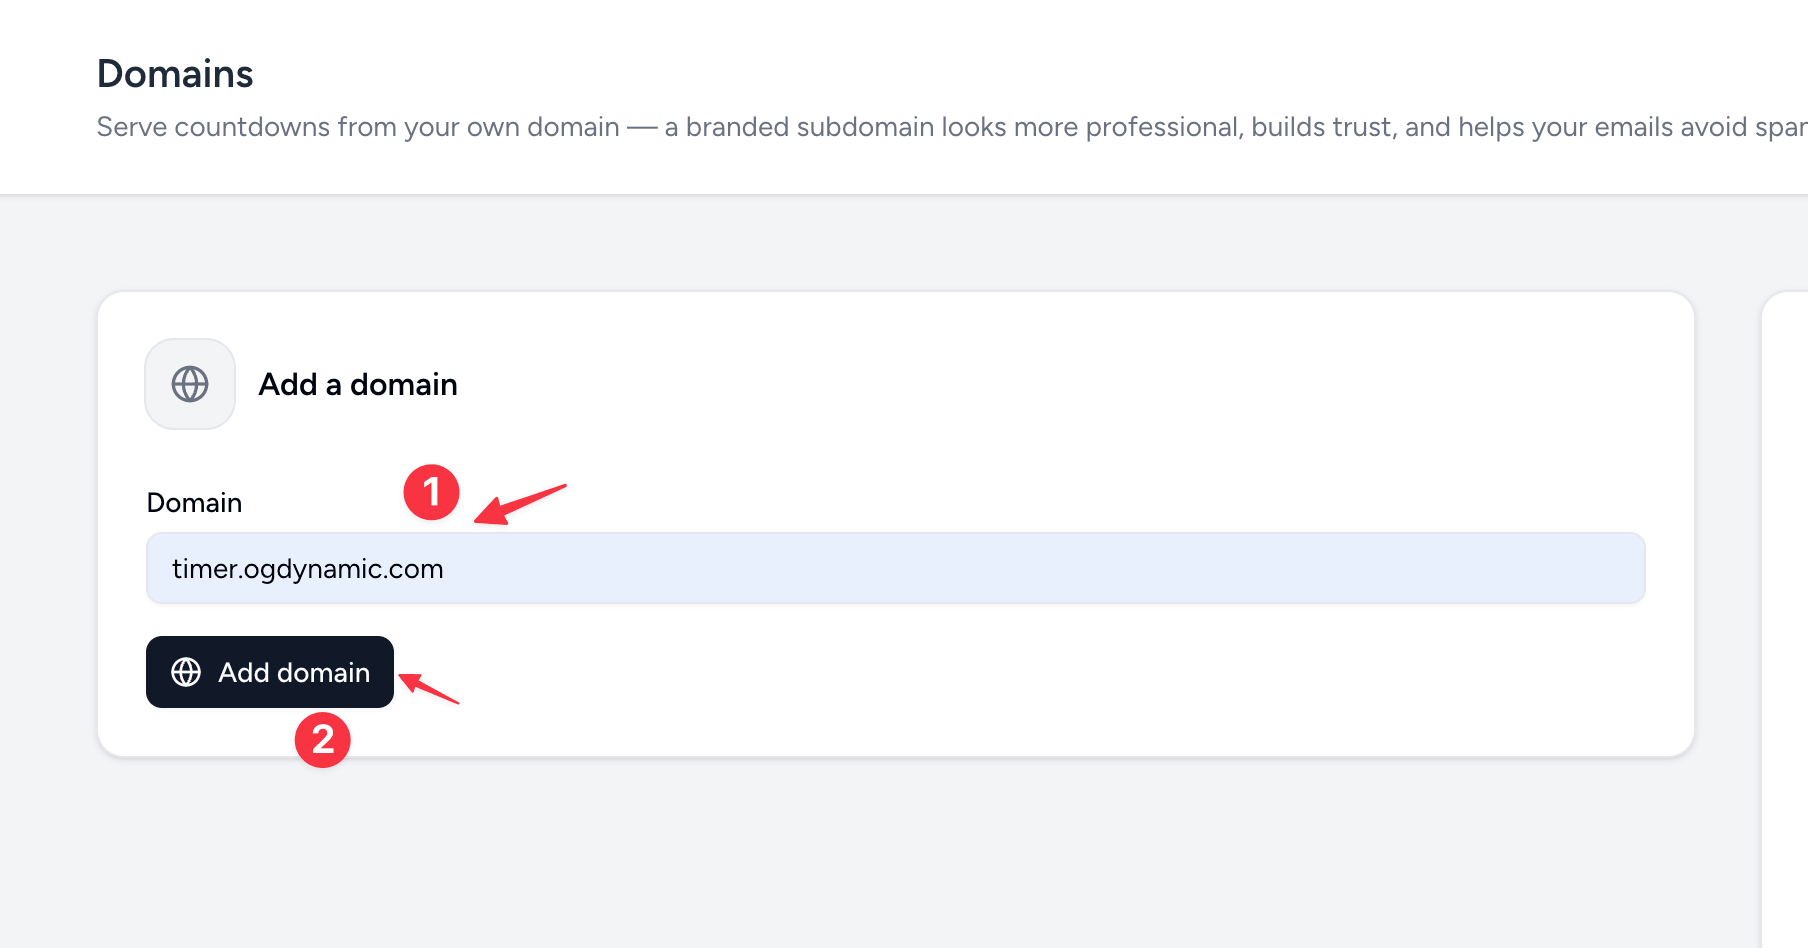
- Log in to your Countdown Builder account at app.countdownbuilder.com.
- Navigate to Custom Domains in the sidebar menu.
- Enter your full subdomain in the domain input field (e.g.,
timer.ogdynamic.com). - Click Add domain.
Step 2: View the DNS Record Details
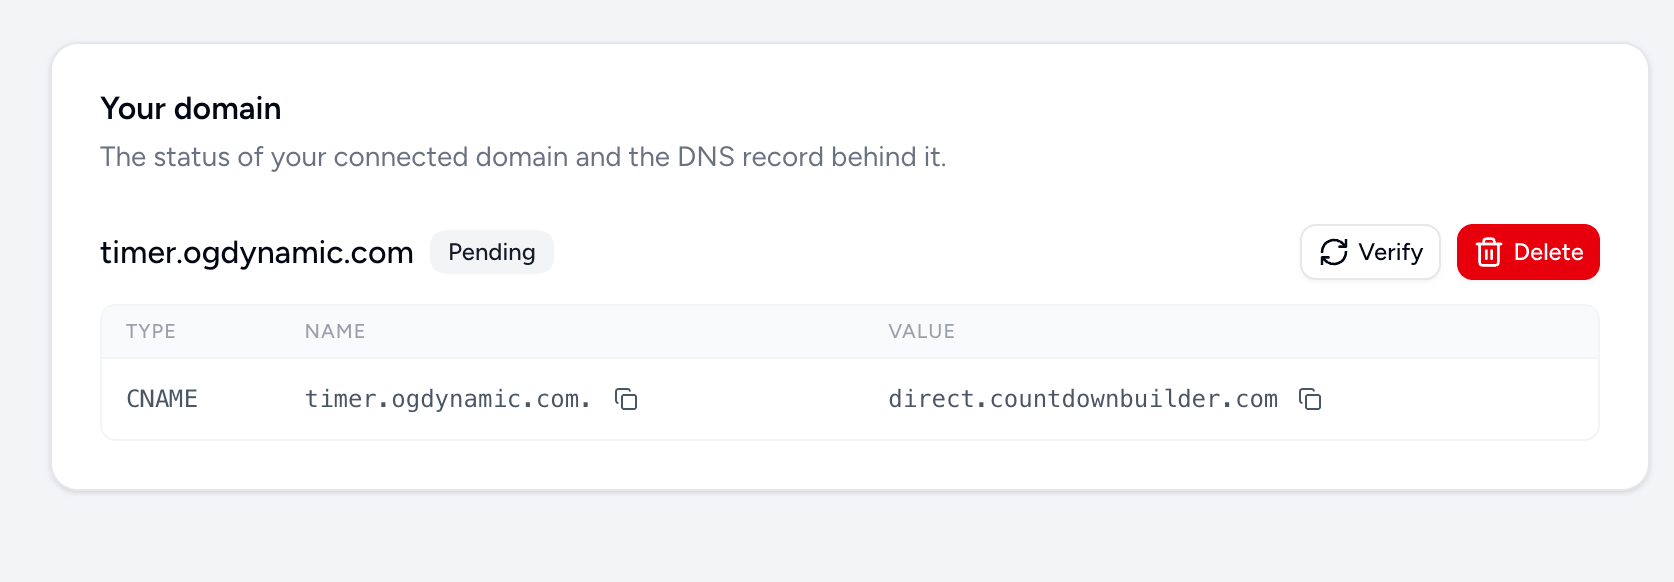
After adding your domain, Countdown Builder displays the CNAME record details you'll need to add in Cloudflare:
- Host:
timer.ogdynamic.com - Value:
direct.countdownbuilder.com
Keep this page open—you'll need these values in the next step.
Step 3: Add the CNAME Record in Cloudflare
- Log in to the Cloudflare dashboard.
- Select the domain you want to use (e.g.,
ogdynamic.com). - Go to DNS → Records.
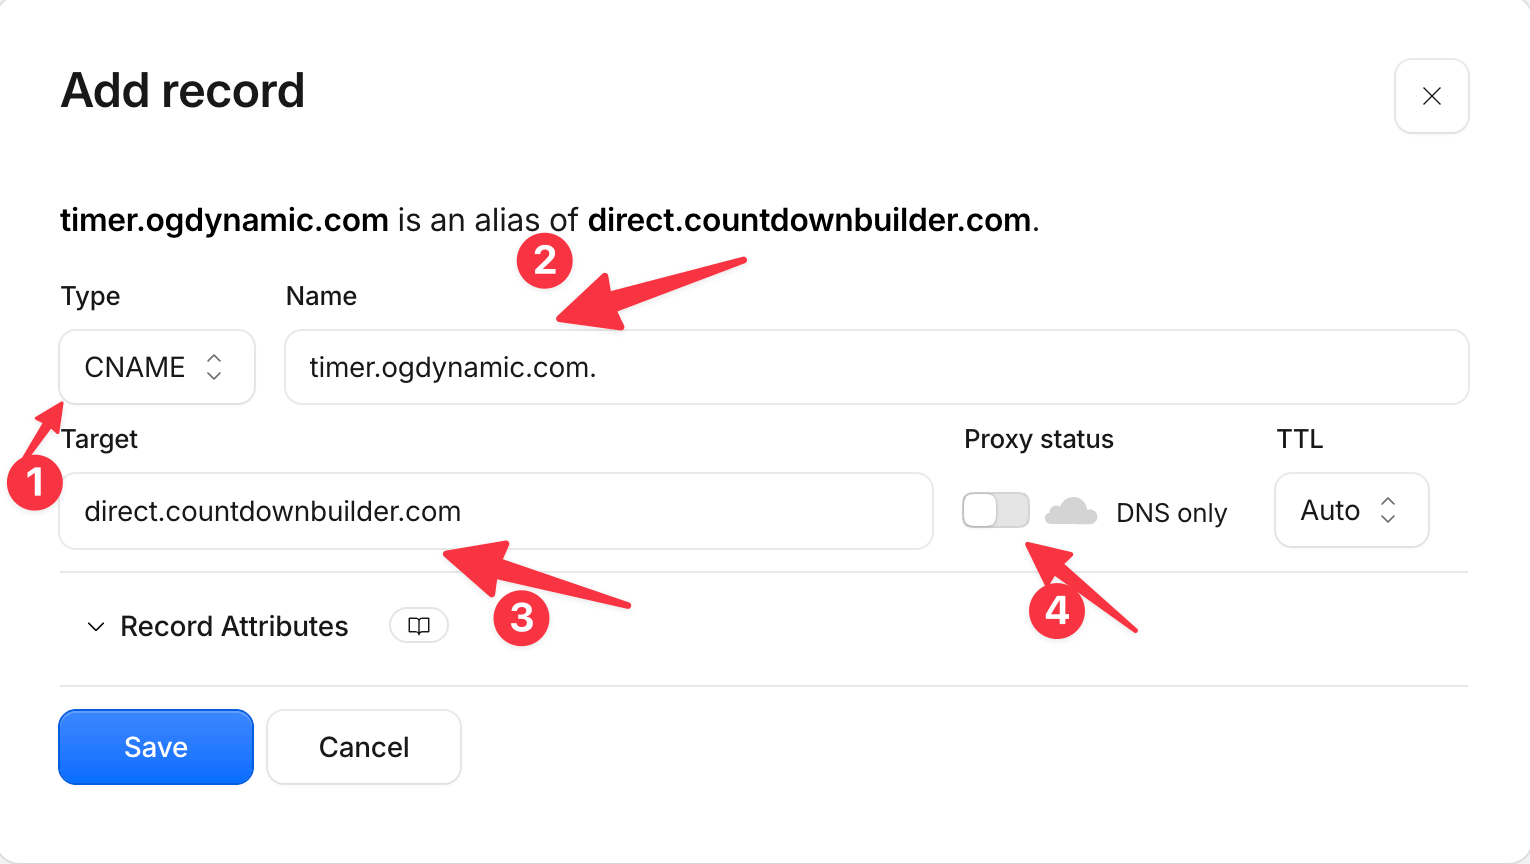
- Click Add record.
- Configure the record as follows:
- Type: CNAME
- Name:
timer(just the subdomain—do not include the full domain) - Target / Content:
direct.countdownbuilder.com - Proxy status: DNS only (gray cloud icon) — important
- TTL: Auto (or 5 minutes while testing)
- Click Save.
Why DNS Only (Gray Cloud)?
Cloudflare's orange-cloud (Proxied) setting routes traffic through its network and can interfere with external CNAME verification and SSL issuance for services like Countdown Builder. Setting the record to DNS only ensures the CNAME resolves correctly to Countdown Builder's infrastructure. You can leave other records on your domain proxied as usual.
Step 4: Verify Your Domain in Countdown Builder
- Go back to Countdown Builder where you added the domain.
- Click the Verify button.
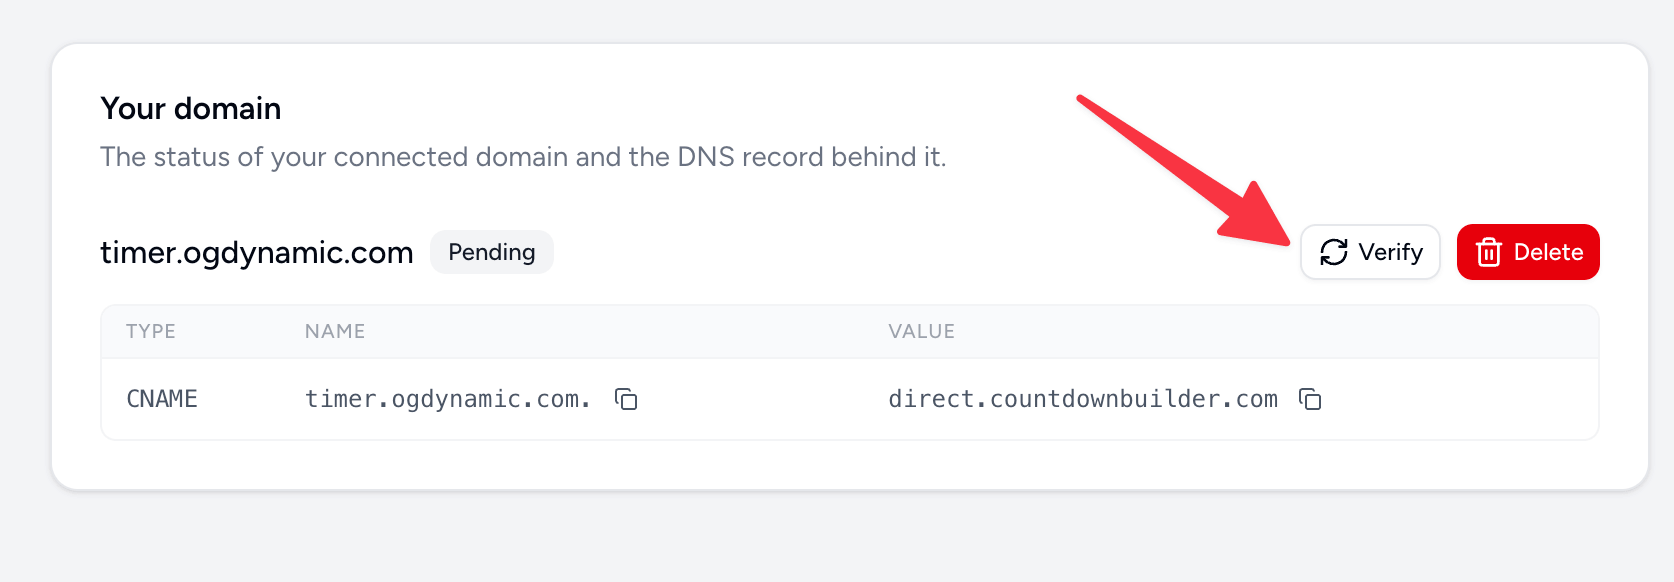
Countdown Builder checks the CNAME record on the spot. Most domains verify within a few minutes. In rare cases DNS propagation can take longer (up to 24–48 hours depending on TTL and global caches).
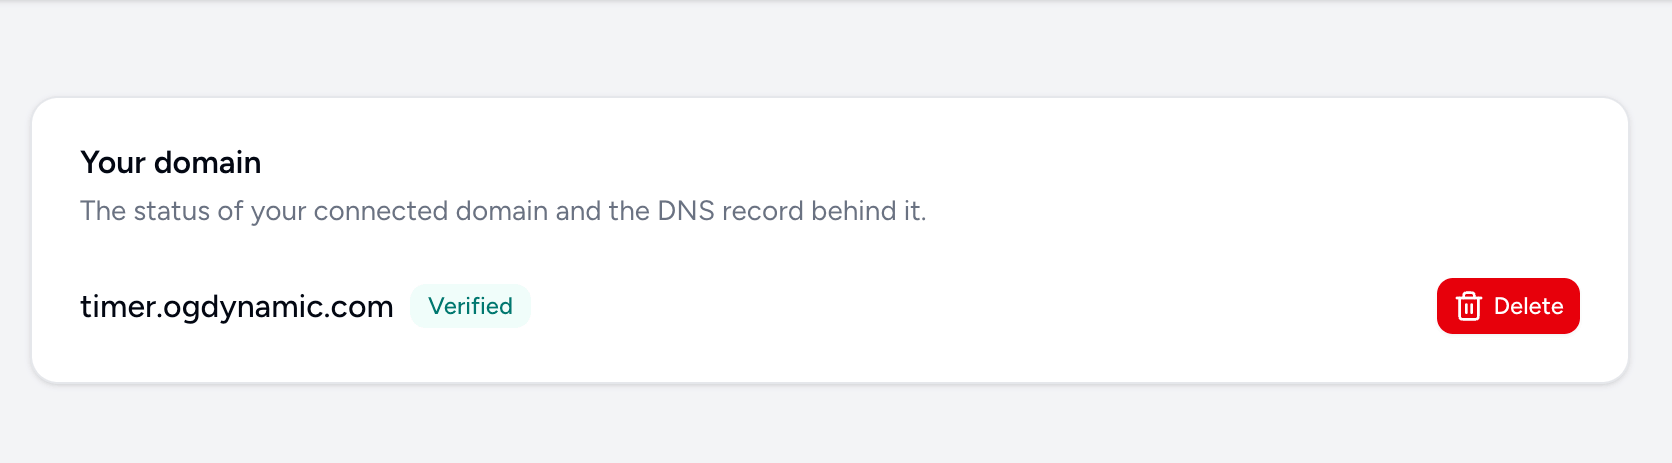
Once verified:
- An SSL certificate is automatically issued and will renew on its own.
- All new and existing timer embed codes switch to your branded subdomain.
- Timers load over HTTPS from your domain with zero extra maintenance.
Step 5: Use Your Branded Timers
Copy embed codes exactly as before. Image and click URLs now use your custom domain (e.g., https://timer.ogdynamic.com/countdowns/...). Paste them into Mailchimp, Klaviyo, ActiveCampaign, HubSpot, or any other platform. The same branded URLs work for website countdown timers.
Quick Troubleshooting Tips
- Verification fails — Double-check the CNAME target is exactly
direct.countdownbuilder.comand the proxy status is gray (DNS only). Wait a few minutes and try Verify again. Use a tool like dig or MxToolbox to confirm the CNAME has propagated. - Still seeing the old domain — Clear any browser or CDN caches, or generate a fresh embed code after verification.
- SSL not ready yet — Certificates usually appear within minutes of successful verification. If it takes longer, re-verify once the DNS record is fully live.
- Orange cloud accidentally left on — Edit the record, switch to DNS only (gray cloud), save, and re-verify.
Frequently Asked Questions
Do I need to buy or install an SSL certificate?
No. Countdown Builder provisions and renews certificates automatically after the CNAME is verified. There's zero cost or maintenance required on your end.
Can I use my root domain instead of a subdomain?
A subdomain is strongly recommended. It keeps your main website and email infrastructure untouched while giving you full branding on the timers. Most users choose timer, img, or cdn as their subdomain prefix.
How long does DNS verification usually take?
Most domains verify within minutes after you add the correct CNAME. Full global propagation can occasionally take longer (up to 24–48 hours), but this is rare.
Which plan includes custom domains?
The Business plan. It also includes everything in the Combo Pack—website + email timers, unlimited views, and no watermarks.
Will my existing timers automatically use the new domain?
Yes. Once your custom domain is verified, all new and existing timer embed codes automatically switch to your branded subdomain. No manual updates needed.
Ready to Go White-Label?
Connecting a Cloudflare domain to Countdown Builder is one of the simplest ways to make your countdown timers fully branded and more deliverable. Add the single CNAME, verify once, and every timer you create from then on serves from your own domain with automatic SSL.
Start free at countdownbuilder.com, create your timers, then upgrade to Business when you're ready for custom domains. Your brand, end to end.
Last updated: September 2026. These steps reflect Cloudflare's dashboard and Countdown Builder at the time of publication; both interfaces can change, so verify current behavior if a step looks different. Custom domains require the Business plan — see the pricing page for current details.
Written by Mehedi Hasan
Writer & Developer. He writes about email marketing, countdown timers, and campaign design.
Connect on LinkedIn