
How to Send a Personalized Coupon with an Email Countdown Timer
 By Mehedi Hasan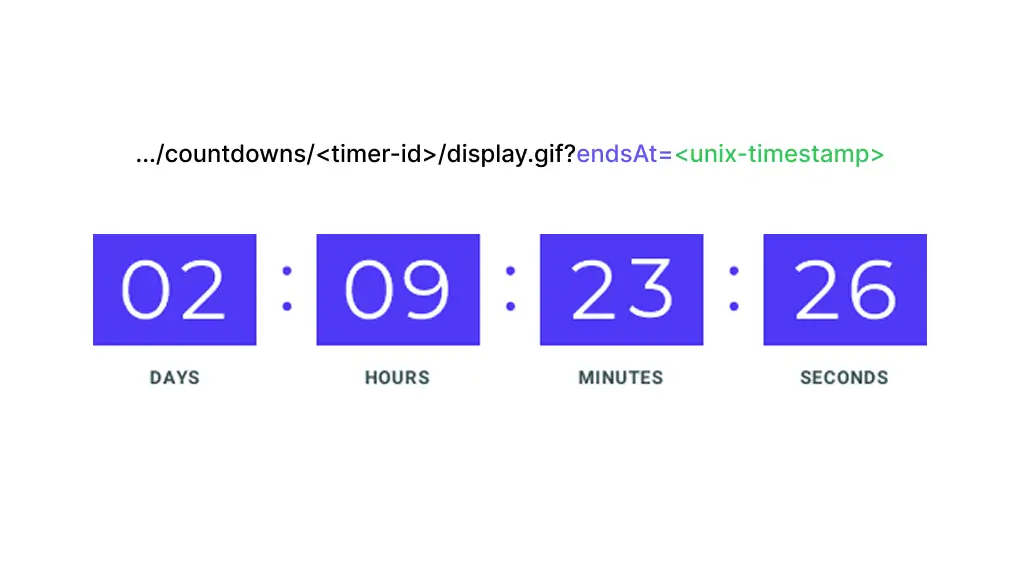
A welcome coupon is a simple offer: a new subscriber signs up, you send them a discount, and they have a short window to use it before it expires.
The hard part is the deadline. If the coupon is valid for 48 hours from the moment each person subscribes, then every subscriber has a different deadline. A standard countdown timer will not work, because it counts down to one fixed date for everyone. And an evergreen timer is not quite right either, because it starts when the email is opened — not when the person registered.
That is the problem a dynamic email countdown timer solves. Instead of one shared deadline, you pass each subscriber their own exact end time. Every person sees a countdown to their coupon expiry — precise, personal, and honest.
In this tutorial, you will learn how to send a personalized email countdown timer using a per-recipient endsAt timestamp, built around a real example: generate a unique coupon when someone registers, then email it with a timer that counts down to that person's deadline.
The Problem: One Coupon, Many Deadlines
Imagine this welcome offer:
"Thanks for signing up! Here is 20% off your first order. Use code WELCOME20 within the next 48 hours."
The first subscriber joins on Monday. The second joins on Wednesday. The third joins on Saturday. If the coupon is "valid for 48 hours from signup," each of them has a different expiry moment.
Now think about the timer in the email:
- A fixed-date timer shows the same countdown to everyone. It only works if everyone shares one deadline (like a Black Friday sale). For a per-person coupon, it is wrong.
- An evergreen timer starts when each person opens the email. That is great for "24 hours after you open this," but it is tied to the open event — not to when the coupon was actually issued. If someone opens late, their timer starts late, and it no longer matches the real 48-hour coupon window.
- A dynamic timer counts down to an exact moment that you define per recipient. You already know the deadline at send time (signup time + 48 hours), so you simply pass it to the timer.
This is the key idea: when you already know each subscriber's deadline when you send, a dynamic email countdown timer is the right tool. It is more precise and more intentional than the other two.
What Is a Dynamic Email Countdown Timer?
A dynamic email countdown timer is a fixed-deadline countdown where the end time can be set per recipient. When you generate the embed code in Countdown Builder, the image and click URLs include an endsAt parameter:
?endsAt=<unix-timestamp>
Your email platform replaces <unix-timestamp> with each subscriber's real deadline (using a merge tag), so every recipient sees a countdown to their own specific moment.
Two details that matter:
- No
endsAtpassed? The timer gracefully falls back to the saved default end date you set in the timer. - Timezone: a passed
endsAtis a Unix timestamp — an absolute moment in time, so it needs no timezone. The selected timezone is only used to interpret the saved default date if no timestamp is passed.
This makes a dynamic timer perfect for deadlines you compute yourself: coupon windows, trial expirations, renewal dates, appointment reminders, and webinar start times.
The Example: A Welcome Coupon on Registration
Let's make this concrete. Here is the flow we want to build:
- A visitor registers (signs up to your list, creates an account, or joins your newsletter).
- Your store or email platform generates a unique coupon for them (for example,
WELCOME-9F4K2for 20% off). - You compute a deadline — say, 48 hours from the moment they registered.
- You store that deadline as a Unix timestamp on the subscriber's profile.
- A welcome email goes out with a dynamic email countdown timer, and each subscriber sees a countdown to their own 48-hour window.
The result: real, personalized urgency. Subscriber A sees "ends in 47:59:00" because they joined a minute ago. Subscriber B, who joined a day ago, sees "ends in 23:42:11." Same email, same campaign, different — and accurate — deadlines.
How the Data Flows
The dynamic timer does not magically know each person's deadline. You provide it. The flow looks like this:
Register → Generate coupon + deadline (signup + 48h)
        → Store deadline as a Unix timestamp on the profile
        → Send welcome email
        → ESP replaces <unix-timestamp> with that person's value
        → Countdown Builder renders a countdown to their deadline
Your email platform handles the personalization (swapping in the merge tag). Countdown Builder handles the rendering (drawing the correct countdown for each value of endsAt). Your store, CRM, or automation handles the logic (creating the coupon and computing the deadline).
That separation is what makes the feature flexible: you control the deadline logic in whatever tool you already use.
Step-by-Step: Build the Timer in Countdown Builder
Step 1: Create a Dynamic Timer and Set a Default End Time
Go to Countdown Builder and create a new countdown. Choose the Dynamic type, then set a default end date, time, and timezone.
This saved date is only a fallback. It is used when an endsAt value is not passed for a recipient. For most sends you will pass a real per-person timestamp, so the fallback is just a safety net — it prevents an empty or broken timer if a merge tag is ever missing.
Step 2: Design and Customize
Match the timer to your brand so it feels native inside the welcome email. In Countdown Builder you can adjust:
- Timer style and template.
- Foreground and background colors.
- Fonts and label text (Days, Hours, Minutes, Seconds — in any language).
- Background images and transparency.
- Pulsing animation for separators.
For a welcome coupon, a clean timer with strong contrast usually works best. It should draw the eye without competing with your coupon code or call-to-action.
Step 3: Make the Timer Clickable (Optional but Recommended)
For a coupon email, the timer should usually be clickable so subscribers can tap straight to their offer. In the countdown editor:
- Open Edit.
- Go to Advanced Features.
- Enable Clickable countdown image.
- Add your countdown URL (the offer or cart page).
- Optionally add an expiry URL for clicks after the timer ends.
The expiry URL is especially valuable here. People open emails late. If a subscriber clicks after their coupon has expired, send them somewhere useful instead of a dead page — the regular store, a "coupon expired" message with a smaller offer, or a waitlist for the next promotion.
Step 4: Copy the Embed Code and Swap In Your Merge Tag
Copy the HTML embed code from Countdown Builder. By default (not clickable) it looks like this:
<!-- Default: not clickable -->
<div style="text-align: center">
  <img style="display: inline-block; padding-bottom: 5px; padding-top: 5px; max-width: 100%" src="https://app.countdownbuilder.com/countdowns/<timer-id>/display.gif?endsAt=<unix-timestamp>" alt="Countdown" />
</div>
When you enable a Clickable timer, it wraps the image in a link, and endsAt appears on both the image and the click URL:
<!-- When Clickable is enabled -->
<a style="text-align: center; display: block" href="https://app.countdownbuilder.com/countdowns/<timer-id>/click?endsAt=<unix-timestamp>">
  <img style="display: inline-block; padding-bottom: 5px; padding-top: 5px; max-width: 100%" src="https://app.countdownbuilder.com/countdowns/<timer-id>/display.gif?endsAt=<unix-timestamp>" alt="Countdown" />
</a>
The important rule: replace <unix-timestamp> everywhere it appears — on the image URL, and on the click URL when the timer is clickable. If you only set it on the image, the countdown will look right but late clicks may go to the wrong place.
After the swap (using a Klaviyo-style merge tag as an example), the clickable embed becomes:
<a style="text-align: center; display: block" href="https://app.countdownbuilder.com/countdowns/abc123/click?endsAt={{ person|lookup:'coupon_deadline_ts' }}">
  <img style="display: inline-block; padding-bottom: 5px; padding-top: 5px; max-width: 100%" src="https://app.countdownbuilder.com/countdowns/abc123/display.gif?endsAt={{ person|lookup:'coupon_deadline_ts' }}" alt="Countdown" />
</a>
That single personalization step is what turns one timer into a different, accurate countdown for every subscriber.
Step 5: Test Before You Send
Before launching, send yourself a real test (not just a preview) and check:
- The timer shows the correct deadline for the test contact.
- The countdown number matches the time left until that contact's coupon expires.
- The timer image and the click link both carry
endsAt. - Late clicks (after expiry) go to your expiry URL.
- The timer looks right on mobile.
A two-minute test prevents an embarrassing send to your whole list.
How to Compute the Per-Subscriber Deadline
The only thing Countdown Builder needs from you is the deadline as a Unix timestamp — the number of seconds since January 1, 1970 (UTC). Two things to keep in mind:
- It must be in seconds, not milliseconds. (A 13-digit number is milliseconds; a 10-digit number is usually seconds. Countdown Builder expects seconds.)
- Because it is an absolute moment in time, you do not need to worry about timezones — just compute "signup time + 48 hours" and convert to seconds.
For the welcome coupon, the deadline is registration time + 48 hours. In code, that looks roughly like:
// registrationTime = a JS Date for when the user signed up
const deadlineMs = registrationTime.getTime() + 48 * 60 * 60 * 1000; // +48h
const endsAt = Math.floor(deadlineMs / 1000);                         // seconds
Store endsAt on the subscriber's profile as a custom field — for example coupon_deadline_ts — and reference it in your email with a merge tag.
Passing It Through Your Email Platform
The exact merge-tag syntax depends on your ESP, but the pattern is the same everywhere: store the computed timestamp in a custom field or property, then drop that field where <unix-timestamp> appears in the embed.
Representative examples (confirm the exact token in your platform's docs):
| Platform | Where the timestamp lives | Example merge tag |
|---|---|---|
| Klaviyo | Profile property (e.g. coupon_deadline_ts) | {{ person|lookup:'coupon_deadline_ts' }} |
| Mailchimp | Merge field (e.g. COUPON_DEADLINE) | *{{ MERGE }}* style field, populated via API |
| ActiveCampaign | Custom field | %COUPON_DEADLINE% |
| HubSpot | Contact property | {{ contact.coupon_deadline_ts }} |
| Brevo / Sendinblue | Contact attribute or transactional param | {{ params.coupon_deadline_ts }} |
Most platforms cannot do "now + 48 hours" date math inside a merge tag on their own, so the cleanest approach is to compute the timestamp where you generate the coupon (your store, your CRM, or a small automation) and write it onto the profile. Then the email simply reads it.
If you use a platform like Klaviyo, Mailchimp, ActiveCampaign, or HubSpot, the integration guides walk through adding a custom HTML block, which is where you paste the swapped embed.
A Copy-Ready Welcome Coupon Email
Here is a template you can adapt. The [Countdown timer] line is where your swapped embed code goes.
Subject: Your 20% welcome code expires in 48 hours
Preheader: The clock is already ticking — here is your discount.

Hi {{ first_name }},

Welcome! To celebrate you joining us, here is 20% off your first order:

  WELCOME-9F4K2

Use it at checkout before the timer runs out.

[Countdown timer]

What you get:
- 20% off anything in the store
- Free shipping over $50
- No minimum spend

[Shop Now]

Your code disappears when the countdown reaches zero — so don't wait.
The timer shows the deadline; the copy makes the offer and the next step obvious. Keep them close together so the eye moves naturally from offer to deadline to button.
A Short Reminder Sequence
One welcome email is good. A short sequence is better. Because each subscriber's deadline is stored on their profile, you can reuse the same embed (with the same endsAt merge tag) across every email — each person still sees their own countdown.
| Timing | Message | |
|---|---|---|
| 1. Welcome | At registration | Deliver the coupon and start the timer. |
| 2. Reminder | ~24 hours in | "Half your time is left." Show the timer again. |
| 3. Last chance | ~4 hours left | "Your code expires soon." Timer next to the CTA. |
The deadlines stay accurate across the whole sequence because they all read from the same per-person timestamp.
Best Practices
Use real urgency. A dynamic timer is honest by design — each deadline is a genuine moment you computed. Do not undermine that by passing a fake, far-future deadline. Real, short windows keep the timer credible.
Keep the deadline consistent everywhere. The timer, the email copy, the coupon itself, the landing page, and the checkout should all agree on when the offer ends. If the email says 48 hours but the code works for a week, the timer loses credibility.
Put the timer near the offer and the button. The sequence coupon code → timer → button is easy to understand and easy to act on. Don't push the timer to the bottom where it gets missed.
Make it clickable, and set an expiry URL. A clickable timer removes friction, and the expiry URL catches late openers so expired emails are never dead ends.
Design for mobile. Most welcome emails are opened on a phone. Short copy, a large button, strong contrast, and Countdown Builder's responsive timers handle this well.
Common Mistakes to Avoid
Using a fixed-date timer for a per-person coupon. If every subscriber has their own deadline, a single shared countdown is simply wrong. Use a dynamic timer with endsAt.
Forgetting endsAt on the click link. On a clickable timer, the parameter must be on both the image and the href. Swap it everywhere, or late clicks may misbehave.
Passing milliseconds instead of seconds. A timestamp in milliseconds is 1000× too large and will set the deadline centuries in the future. Always send seconds.
Computing the deadline at send time but sending later. If your automation queues the email for hours, "now + 48h" should be measured from registration (or send), consistently — pick one and use it everywhere.
No fallback. Always set a sensible default end date in the timer. If a merge tag is ever empty, the fallback keeps the email looking intentional instead of broken.
Frequently Asked Questions
Does a dynamic timer start when the email is opened?
No. That is what an evergreen timer does. A dynamic timer counts down to a fixed, exact moment that you pass with endsAt — set at send time, not tied to the open. See how it compares in the Dynamic Timer overview.
What happens if I do not pass endsAt for a recipient?
The timer falls back to the saved default end date you configured, interpreted in the timer's timezone. It is a safety net, not the primary deadline.
Do I need to know each person's deadline when I send? Yes. Dynamic timers are for when you already know the deadline at send time (computed from signup, purchase, trial start, renewal, and so on). If the deadline should instead start on open, use an evergreen timer.
What format is endsAt?
A Unix timestamp in seconds — a 10-digit number representing the number of seconds since January 1, 1970 (UTC).
Final Thoughts
A personalized coupon deserves a personalized deadline. With a dynamic email countdown timer, you can give every new subscriber their own countdown to their own 48-hour window — accurate, honest, and unique to them.
The setup is small: compute each person's deadline as a Unix timestamp, drop the matching merge tag into the embed where <unix-timestamp> appears (on the image, and on the click link if clickable), and let Countdown Builder handle the rest.
Ready to try it? Open Countdown Builder, create a Dynamic timer, and send a welcome coupon that actually counts down to the right moment for every subscriber.
Last updated: September 2026. Product features described in this article reflect Countdown Builder at the time of updating and can change. Verify current behavior in the app before relying on specific settings.
Written by Mehedi Hasan
Writer & Developer. He writes about email marketing, countdown timers, and campaign design.
Connect on LinkedIn